Professional results with do-it-yourself economy
Making a Formica Full Backsplash and Countertop
The tricks and tools to make it right
Have a comment or question on my backsplash project?
Email me at:
kinch@truetex.com
Richard J. Kinch
Back to Home page
This page describes how I built a Formica laminate full backsplash and
countertops for a kitchen remodeling project. This is a moderately difficult
do-it-yourself task. I'll just describe the basics and a few tricks needed to
get a good result, and the rest should be obvious.
A "full" backsplash covers the entire exposed wall,
instead of the usual 4-inch high style on the base of the wall.
This requires cutting and fitting an oddly shaped piece, including
cutouts for outlets and switches.
While more expensive in time and materials,
a full backsplash gives you a tough laminate surface that
is easier to clean and more durable than a painted gypsum board wall.
It also can cover up a rough or deteriorated wall.
Materials should run only about $3 to $4 per square foot.
|
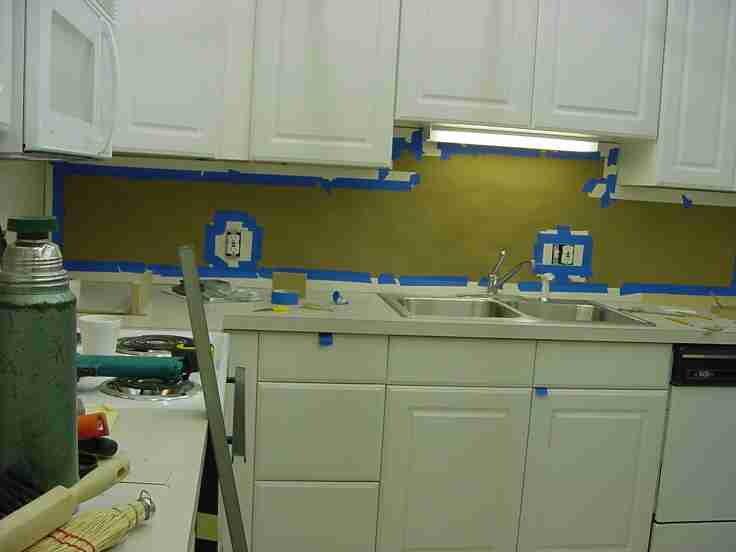
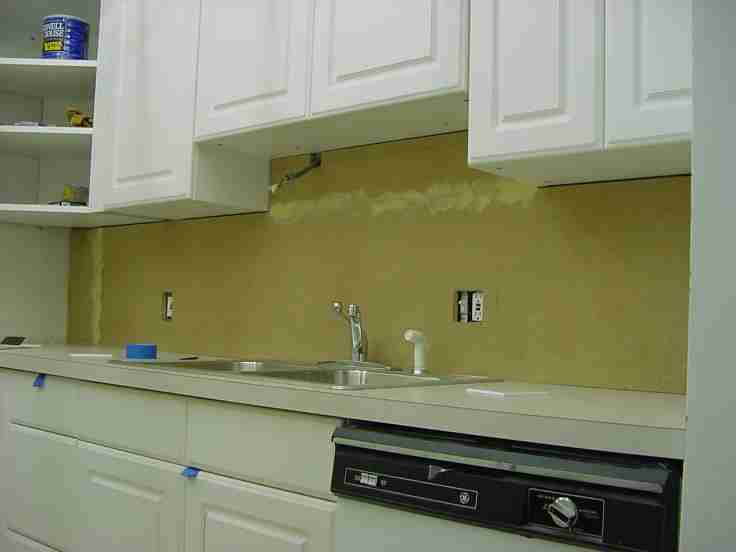
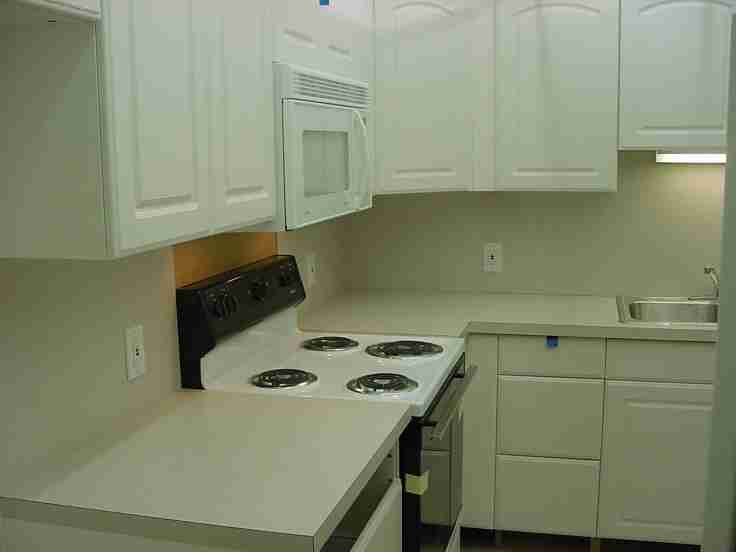
This is the kitchen being remodeled, part of a beachfront condominium
apartment. The new cabinets, countertop, and sink are already in place.
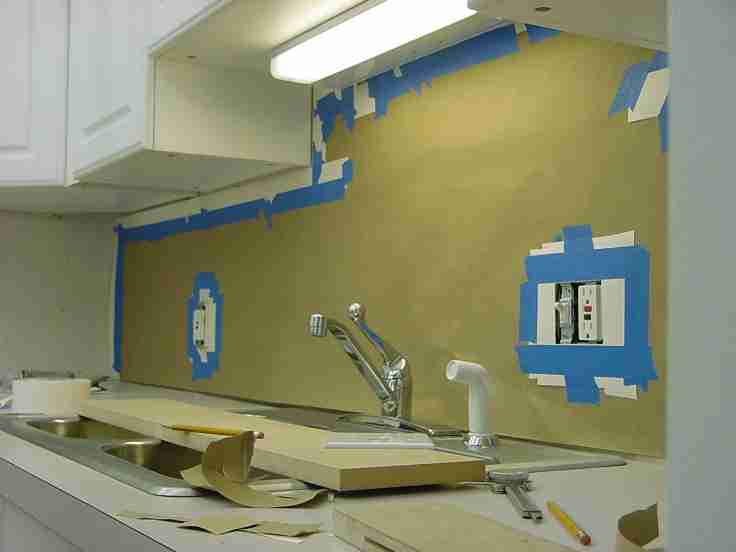
The first step for fabricating the backsplash
is to make a custom template for the precise shape
needed.
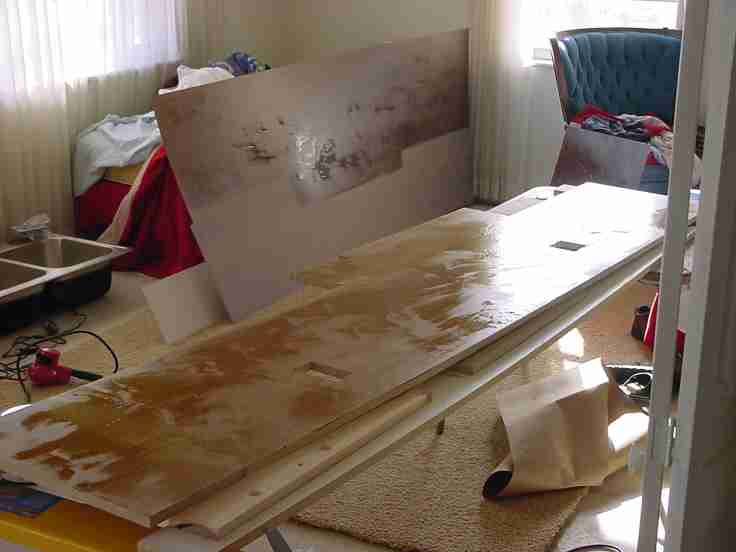
The purpose of the template is to model the final shape
in a material that is very easy to work and also easy to remove and copy.
I used a 36-inch wide roll of builder paper (the brown material in the photo, available in the
paint department of home improvement stores) for the rough shape of the
template. The rough shape is first cut a bit large, trimmed
back using a utility knife to within an inch or so of the desired edge,
and taped to the wall using masking tape (the blue material in the photo).
Pieces of 2-inch paper drywall joint tape (the white material in the photo) are then taped over the rough paper
edges to "fine tune" the precise finished edges.
The joint tape provides a stiff, accurate straight edge where needed.
The masking tape holds the pieces together and the whole template on the wall, but
also allows you to peel the finished template off the wall.
The template as shown in this photo is not yet finished, because the bottom edge
has not yet been trimmed.
I've heard also of using thin strips of wood and hot-melt glue to make a
skeleton type of template. That method would require more work to fabricate,
but easier to use once it is off the wall.
|
|
|
Here, from a different angle, you can see the bottom edge trimmed
with joint tape.
The cutout size for electrical boxes is a compromise. You need
something a bit larger than the face of the box and especially the screw
positions, to allow for inaccuracy of the fit;
but the finished covers have to completely cover the edges of the cutouts.
The electrical code inspector also wanted electrical box extensions ("goof rings")
covering the edges of the backsplash material, so there had to be room to
accommodate those as well.
If you're familiar with the electrical code, you might have noticed that the
outlet and switch combination isn't quite properly placed, being above the
right corner of the sink. This is a holdover from the 1970s design.
The code inspector allowed it to remain as a "grandfathered" feature.
|
|
|
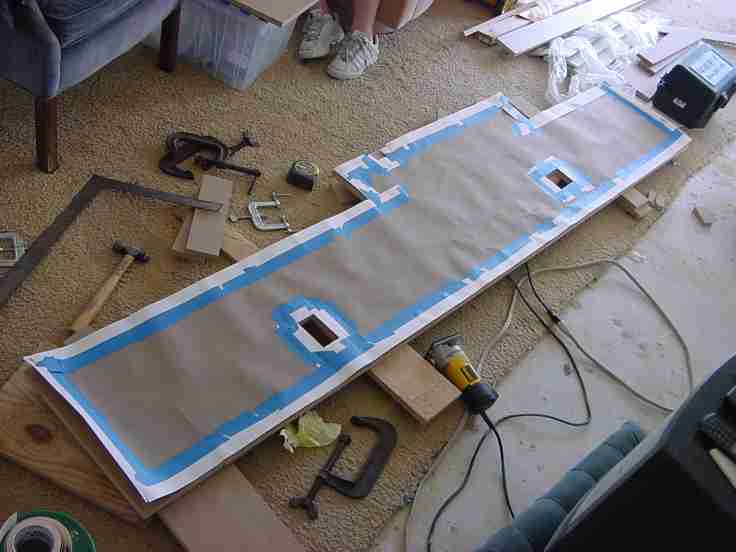
Once you finish making the template, you transfer it to the rough stock which
you will cut to fit the pattern. In this photo,
the template is over the 3/4-inch MDF (medium density fiberboard) material.
The material cutting and gluing is done. This piece is about 10 feet long.
I had only 8-foot lengths of MDF available, so I used a biscuit joiner and glue to extend
the MDF to the 10-foot length. I also glued up the riser portion above
the sink rather than trying to make inside corner cuts.
These three rectangular pieces were reckoned for size before the template was made,
and try-fitted to be a bit smaller than the space to be filled.
The real purpose of the template is to place the various cutouts accurately, not to
make the board extend completely flush to the edges of the space.
Gaps at the edges will be treated by caulk or pieces of trim.
Note the notch at the top of the riser where the power for the undercounter light
fixture comes through the wall.
This notch must be accurately placed to hide it completely behind the fixture.
You can see in this photo I was using the DeWalt 670
(manufacturer's Web page)
laminate trimmer.
This tool can not only trim the Formica, but can also work as a lightweight router
to neatly plunge-cut the outlet holes.
I cut these holes by marking the shape with a pencil through the template,
and then for each of four edges, clamping a straighedge to the work and following
the straightedge with the power trimmer.
I used a cheaper set of carbide bits for laminate trimming (the standard set consists of
a straight cutter, a straight trimmer with ball bearing, and a bevel trimmer with
ball bearing) made by Vermont American. I used a more expensive 1-inch Bosch
straight cutting bit to carve the cutouts in the 3/4-inch MDF.
I was also able to use the Bosch bit and a straightedge to improvise a last-minute cut on
the MDF board, since I didn't have a power saw available at the job site.
|
|
|
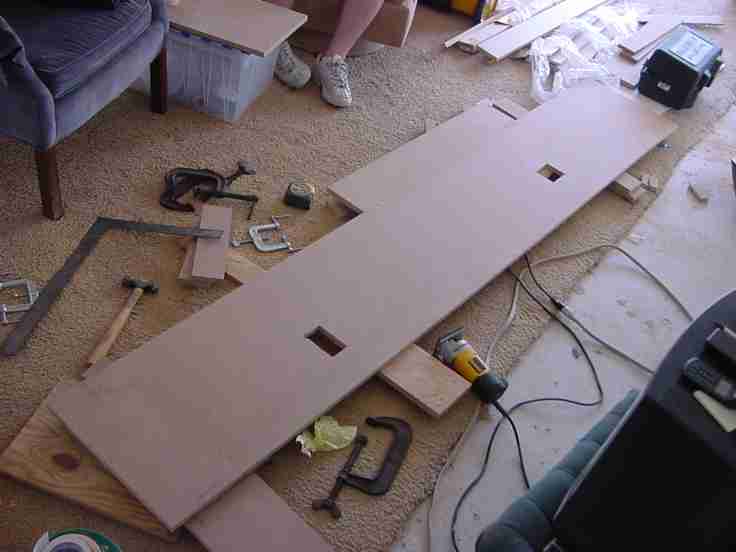
Here's the MDF work with the template removed.
MDF is a superb material for rough cabinet-making.
The cleanly-cut biscuit-joined seams are invisible in this limited-resolution photo.
I had Home Depot cut a sheet to a drawing of my final sizes on their panel saw.
|
|
|
This is a try-fit of the cutouts. I had cut them conservatively, and with this
try-fit marked with a pencil the final shape for the attachment screws. Then
I removed the work and carved the cutouts a bit larger with the trimmer/router freehand.
You can see the yellowish wood-filler on the seams for the riser and the far end
This filling and sanding makes a smooth, continuous surface for a solid laminate bond.
|
|
|
To laminate a substrate with Formica, you paint both mating surfaces with a thin
layer of contact cement. In this photo you can see the wet appearance of this
cement on the MDF board and on the back of the piece of laminate.
I traced with pencil the shape of the board onto the back of the laminate to
know what area of the full sheet of laminate needed to be painted with glue.
Contact cement is sold in two different formulations, water- and solvent-based.
I used the solvent type because it is ready to bond in just a few minutes, and
is reputed to bond better. The only advantage to the water-based formula would
seem to be the absence of solvent fumes.
The solvent-based cement cleans up easily with any petroleum solvent such as naphtha
or mineral spirits.
The contact cement dries to a tacky surface after only a few minutes, at which time you must
promptly set the laminate in place to get the maximum bonding power. The contact bond is instant and permanent, but
it only sticks to itself; one item painted with contact cement will not stick to another item
that isn't painted with the same cement.
Thus to align the laminate on the base, you are free to first lay dowels across the base about every 6 or
12 inches. You then can lay the laminate approximately in place on top of the dowels, since the
dowels will not be permanently stuck on the surfaces.
Then working from the center out, you make the final alignment, press down an area
to fix the aligment, and progressively remove dowels and apply more pressure.
Using a rubber roller tool gets all the bubbles and stresses out.
While the bond is instant and serviceable, the tightest joints on edges
come from clamping overnight.
You must support the base well to laminate a large piece like this.
If it were to bow down in a slight curve while bonding the laminate, you would end up
with either a permanent distortion or a stressed bond that would tend to delaminate
when the curve was straightened into the final installed position.
|
|
|
After gluing the laminate on the MDF, I used the square trimmer bit to run around the
edges of the work, including the cutouts. All of these edges are covered by trim so
there's no need for beveling.
The backsplash is held against the wall by the outlets, by unglued biscuits in the
countertop, and by screws that will be hidden underneath the top trim.
|

|
|
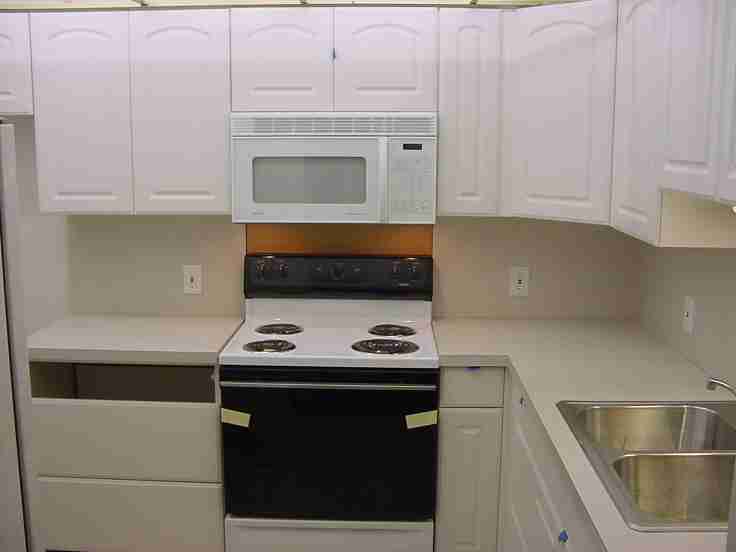
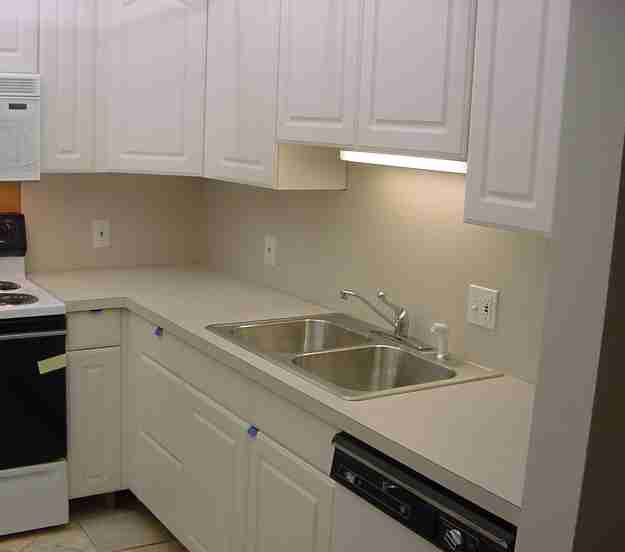
This is the finished work.
|
|
|
|
The space over the range is unfinished MDF.
This will be tiled over with a heat-resistant ceramic design.
|
|
Further Tips
Let me add a few tips I learned about working with Formica laminate.
Formica laminate comes in a lot of different sheet sizes. Home Depot and Lowes
seem to stock only 4 x 8 sheets, and a small number of colors. By going to
the local distributor, instead of those retail stores, I was able to get 3 x
10 sheets that avoided having to seam the material. The distributor is
oriented towards the trade, but is happy to sell to do-it-yourself'ers. The
one in my area also had a lot more colors and styles in stock, and better
prices.
It wasn't obvious to me, until I saw the crew at the loading dock of the
Formica distributor's warehouse, that you can roll up a 10-foot sheet of
Formica on about a 2-foot diameter and tape the outside that way for transport.
That makes it much easier and more secure to move around.
If you install the wall-hung cabinets after making the backsplash, you can get
a somewhat better fit between the backsplash top edge and the wall cabinets'
bottom edge. However, you still need a template to cut the odd backsplash
shape, which will not typically be rectanglar if the floor and counter
cabinets are not perfectly level.
A sheet of 3/4-inch thick MDF (49 by 97 inches) sold for $18 at Home Depot
when I did this project in 2002. For that price they would also do unlimited
cuts from my plans on their panel saw. That sure beat wrangling a
straightedge and circular saw, or trying to haul the full sheets. Be
sure to get a saw operator who will guarantee a suitable dimensional tolerance on
the cuts, where that is critical.
MDF is spoiled by water, so don't use it where it will inevitably get wet, like
the bases of counters.
Making Countertops
I haven't explained much on this page how I made the rough countertop or how I
laminated the rough countertop. The process is mostly a simpler subset of the
backsplash techniques.
Since the countertop areas were all rectangles or combinations of rectangles,
I was able to cut the rough pieces using simple measurements instead of
templates. I used two layers of 3/4-inch MDF, fastened together with drywall
screws sunk into the surface. For strength, the joint at the corner of the
L-shape was placed at a different location on one layer versus the other
layer. Over the screws heads joining the layers together, I applied wood
filler and sanded, to provide a smooth surface for the laminate. This makes a
very heavy and solid countertop, perhaps a little more sturdy than is needed
(it is more common to fabricate something lighter using a single top layer of
3/4-inch material, with only 3/4 by 3- or 4-inch cleats running underneath at
the edges and across the cabinet tops). I used a biscuit joiner (simple
screws would have also worked) to glue a 1x2 pine edge strip on the vertical
outside edge of the counter, and used wood filler and sanding to get a flat
and square surface along those joints. The resulting counter depth,
consisting of half of the initial 49-inch sheet width, less saw kerf, and plus
the 3/4-inch of pine edging, is about 25 inches, which is about the standard
counter depth. This provides an inch or so of desirable overhang past the
24-inch deep standard cabinets. The rough countertop is held to the cabinets
from screws inserted from underneath through cabinet members; in theory the
countertop could be detached and removed from the cabinets at a later time.
The cutout for the sink is patterned using the template that comes with the
sink, and cut first at the corners with a hole saw, and completed with a
reciprocating saw.
Applying and Trimming Laminate
Let me explain some of the details of how you cut, apply, and trim Formica
laminate to any surface, since my backsplash explanation concentrated on the
template techniques.
Cutting laminate: There are various methods purported to easily cut
laminate, such as using a scoring knife followed by bending. These seem to
easily result in a ruined, splintered edge that must be allowed for and
wasted. Sawing will work only if you have a sharp, fine-toothed,
carbide-tipped blade in a table saw or radial-arm saw which can properly
support the material. Casual methods, dull tools, or improper suppport will
yield a ragged and/or inaccurate cut that will wind up costing you in excess
material. Sometimes you are trying to fit several pieces out of a larger
piece, and your accuracy and reliability of cutting may determine whether you
can get by with buying one smaller unit of material versus a larger and more
expensive unit.
Instead, to make my cuts, I used a tedious process of fencing the cuts with a
straight edge and clamps, and running the trimmer/router along the fence,
using the straight trimmer bit as a cutter. The straight edge fence can be
simply a strip of wood or a fancier metal straightedge. This yields a
reliable cut that does not splinter apart the layers of material making up the
laminate.
You absolutely must have a fence to guide the trimmer. If you attempt to save
time by cutting freehand, the high-RPM bit will chew its way through the thin
material in uncontrollable paths, quickly ruining large quantities of your
expensive supply. I was able to enlarge the cutouts on the laminated
backsplash using the straight cutter in freehand mode, but that was only
because the thicker MDF material was providing a rigid, slow-yielding backing.
If one had a lot of material to cut, I suppose it would be economical to rig
up a table for efficiently clamping and fencing straight cuts, rather than
manipulating C-clamps and a straightedge. I understand that production shops
use elaborate tooling for this purpose.
Router jigs are a another tool to consider for this type of work.
Jigs improve the accuracy of the cuts and reduce the setup time.
You can improvise shop-made jigs by glueing thin wood guide rails to
scraps of hardboard. If you have outlet and switch box cutouts to
make repetitively, jigs will improve efficiency. A long, straight jig
for cutting the Formica will speed that task and reduce the chances of
spoiling expensive material with a flawed cut.
Laminate trimmer tooling: Three router bits are standard
equipment for laminate finishing: (1) a straight cutter with no bearing,
(2) a straight cutter with ball bearing, and (3) a beveled cutter (20
or 22 degrees typical angle) with ball bearing. You use (1) for free
rough cuts such as I have already described. You use (2) to trim edges
which will be covered by more laminate, such as on the vertical surface.
You use (3) for finished exposed edges such as the outside corner of
the top layer of laminate.
Since the power trimmer does not reach all the way into
some corners and edges, you also use hand files to finish some edges. Indeed,
it is possible, although laborious, to do all the edge finishing with hand
filing.
The ball bearings in the high-RPM power bits allow you to follow the
contour of the finished surface without scorching the finish with frictional
heat. You must be careful to keep these bearings free of stray cement and
other contaminants to avoid distorting the traction or heating the work. As
you cut the glued material, the gummy cement will inevitably build up on the
bits. I used naphtha on paper towels and Q-tips to clean, with a bit of WD-40
or light mineral oil for lubrication.
The straight bit (2) needs a coarse depth adjustment in the trimmer, simply to
ensure that the cutting edge spans the laminate thickness.
The bevel bit (3) requires a fine adjustment explained below.
Bits are available as plain steel, cheap-import carbide, and expensive
brand-name carbide. The carbide-tipped bits (even the cheap imported variety)
are definitely worth using instead of plain steel. They are sold in sets for
laminate trimming, or sometimes as individual bits. The cheapest steel bits
(no ball bearings) are reputed to be impossible to use without scorching.
Applying vertical edging: The laminate vertical surfaces are applied
first to the rough countertop, since the top layer of laminate should cover
the edge of the vertical layer. To allow for trimming, one cuts strips
slighty larger (perhaps 1/4 or 1/2 inch, something larger than your cutting
inaccuracy) than the finished edge size. After applying them with the contact
cement, I used the laminate trimmer to finish the edges. For this trimming
you use the straight ball-bearing bit (2), since this edge will be covered by
the top laminate.
Applying top layers: Once the vertical edges are laminated, the top
laminate is applied. This is cut and cemented in the same manner, that is,
cut slightly larger than needed and glued with an overhang, ready to be
trimmed back. Trimming on the top layer is done with the beveled bit (3)
instead of the straight bit (2). The beveled bit needs a careful fine
adjustment for depth-of-cut in the trimmer, such that the ball bearing traces
the vertical face and applies the rotating cutter to just trim the full
thickness of the top (horizontal) laminate and slightly into the surface of
the abutting edge strip (vertical) laminate. Hand-filing is needed to finish
tight inside corners and the tips of 3-way outside corners. Be sure to run
the hand file in the proper diagonal direction, so that the cutting edges
shave instead of slice. Inside corners of L-shape tops are best left with a
slightly rounded fillet of laminate, instead of a sharp internal corner, to
avoid a possible stress point that could cause a crack; the tiny overhang will
not be significant or even noticeable.
Variations:Other techniques such as laminating tight curves are
possible. There is a thinner laminate (1/32" instead of 1/16") sold for
this purpose, although you'll want to check that your distributor sells
the style of laminate you're using in the thinner strips. Alternatively,
you can thin down pieces cut from the standard thickness material,
using a sander. You can also cut numerous grooves across the back of
the laminate with a triangular file perpendicular to the bend path.
Exposed wood edging is another handsome edge-treatment technique.
First, you "bury" a strip of decorative wood (such as oak hardwood or
clear pine) under the edge of the laminate. Then, instead of trimming
normally, you use a rounter bit that cuts into the corner to reveal the
wood underneath and simultaneously trim the laminate to the exposed wood.
See my sketch [15 KB PDF file] of the
arrangement.
Have a comment or question on my backsplash project?
Email me at:
kinch@truetex.com
Richard J. Kinch
Back to Home page
Copyright 2002, Richard J Kinch