| Before | After | |
 |
 |
| Before | After | |
| |
|
I last updated this essay in May 2018, from my project performed in 2002.
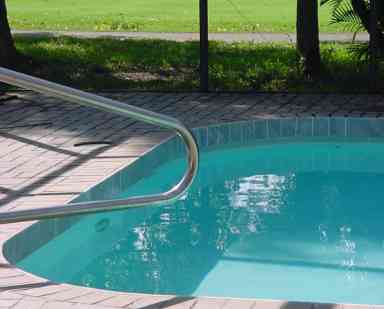
This page describes a big do-it-yourself project I (and my family) undertook to refurbish our swimming pool in Palm Beach County, Florida USA. The pool size is 18 by 36 feet, holding 27,000 gallons, and was built about 1978. It is constructed in the conventional manner of a concrete shell finished with several layers of plaster. I believe, based on removing loose areas of the old plaster, that it had been refinished once before by some previous owner.
For my essay describing how I use a computer to control this pool's equipment, see my pages at http://www.truetex.com/poolcontrol.htm.
Plaster finishes last 7 years or more, depending on how well they are installed and cared for. Refinishing was badly needed by the time we owned this house and summoned the will to attack the refinishing project.
The entire project eventually encompassed far more than replastering. Based on estimates from contractors, the expense to have all this work contracted would have been about $25,000 (in 2000, with perhaps $5 to $7 thousand for just the plastering). For a red-blooded guy who does his own oil changes, what else could I do? I decided I would do this little project myself, too. I would learn, I would craft, I would teach my children things new to us all. And thus on and off, from October 2000 to October 2001, it happened.
Retrospective in 2018: In the years following completion in 2001, my replastering work held up well. The beauty of the new surface started to show its age after about 10 years (2012), and by 2015 it was rough in several areas and difficult to keep clean. This is all normal; I was happy to get over 10 years of service out of the project. Since then I have drained the pool and kept it idle, pending another resurfacing job. This avoids the constant cost and chore of pool maintenance, and with most of the kids grown up and away now, we don't much miss the use of it. If I am to embark on another do-it-yourself attemp, I plan to experiment with newer tools and techniques lately available, and improvise a plaster skimming method with diamond polishing, as an alternative to the massive full-thickness troweled replastering.
The following major stages were involved:
The "before" of "before and after". Or, "Dad, the sump pump quit again".
Mom and the loyal mixing crew.
The application crew, well-trained after a few sessions.
A dad, a big guy, and a special plastering hat.
I am master over the deep end.
That's me under all that plaster.
The professionals always make it look easy.
We done it!
A last crew pose before the filling begins.
No, that's not Mountain Dew, it's EPA-approved chloraminated tap water! Ewww!
Pure water plus white plaster equals blue pool.
All the design elements converge here.
At last, rest and tranquility.
What follows is some quickly recorded notes about some important details I learned about pool plastering, which I am publishing because of the dearth of reliable and complete information on pool plastering. I hope to add in the future more detail about the many other steps involved in the project.
None of this is a secret. But it is difficult to learn without some very hard-won experience, or a trustworthy expert to train you. I am not such an expert, having done all of one job in degrees from tear-out-and-do-over bad to will-be-fine-after-it-sets-and-we-polish-out-some-problems. I had nothing but manufacturer's instructions and Web research to learn from, but I know a few things about physics, chemistry, and materials that helped me discover enough to do a passable job on the first try. (Well, "first" if you don't count that one batch of plaster we had to throw out.) By the end I felt like an accomplished novice, which is someone who thinks, "next time I'll know how to do this right." But I also harbor some perfectionism in my attitudes, and I know that on this job my best efforts were working better, by the end, than lots of contracted jobs I've seen since. That's as much due to the diligence of the homeowner's self-motivation, which is his unique advantage over the tedium of labor, as it is to newly acquired skill.
The plastering trade tends to be very secretive about their techniques. In my area the contract for a plastering job is typically made by a well-dressed, well-paid salesman, who produces volumes of endorsements, referrals, recommendations, and photos of splendidly perfect past jobs, whereupon after signing you discover that the crew actually doing the work consists of very skilled and polite, but not English-speaking, laborers who have been hired as independent subcontractors from some other part of the world where swimming pools are non-existent. Once you realize that plaster as a building material is still used in less-developed countries, you understand that perhaps this is a good thing for your concerns. You don't see the Anglo boss except when he collects payment (if you were tough enough to hold out for payable-on-completion). This all adds to the mystery of how it is done. The tradesmen don't seem to care if you watch, and I did watch a few jobs done for my neighbors this way. But there just isn't anything like a textbook description of all the tips and tricks to doing this work, at least not that I could find, and they certainly aren't giving you a running narrative of their every deft, cat-like move, not least because they are so well-practiced at it that they don't have to think about it that much. But watching a few professional runs did equip me with a knowledge of what tools and materials were appropriate, and how things work in general and on what pace. Some tools, like stepping boards, must be improvised yourself.
Pool plaster is nothing more than a kind of concrete, that is, a mix of portland cement, aggregate, and additives. Despite what the contractor's salesmen want you to believe, it is not a mysterious material containing diamonds or secret ingredients. While the aggregate in common concrete (such as is used to pour slabs and sidewalks) is stone gravel in a blend of sizes, in pool plaster the aggregate is fine quartz sand (also called silica sand, quartz being also called silica) or very fine marble dust. These days it is fashionable to use quartz sand which has been dyed with pretty colors, and while the dyeing process involves some impressive chemistry, the plaster itself is not otherwise different in application. Certain chemicals such as calcium chloride (accelerator), gypsum (calcium sulfate, retarder), or lime (calcium oxide, retarder) may be added to improve workability (rheological factors such as plasticity and thixotropy) and to slow or accelerate setting time. The hydration and consequent setting of portland cement is a very complex chain of chemical reactions, which is why the full strength takes many days to develop, and why accelerators and retarders can have profound effects.
Your placement and troweling techniques will be better if you understand how portland cement paste hardens with an "initial set" and a "final set". The initial set occurs within an hour or two of mixing (depending on the accelerators or retarders), and prevents any further handling or placement.
ASTM standard cements are designed to have an initial setting time of not less than 60 minutes, and a final setting time of not more than 10 hours. If you want to scientifically test a product for setting time, you can improvise your own Gillmore (ASTM C266) tester. You first form a pat of cement 3 inches in diameter by 1/2 inch thick on a glass plate (a scrap tile will do). For the Gillmore test, you apply a pin of 1/12 inch diameter weighing 1/4 lb, which will not indent the pat when the initial set has occured, and likewise 1/24 inch and 1 lb when the final set has occured. The pin pressures are 46 psi and 733 psi respectively. The Vicat test (ASTM 191, British standard BS12) is a similar method. Note that this test is specified for the cement paste alone, not the mix of cement and aggregate. Note that the specified pressure for initial set would permit an 250 lb worker to walk on new plaster with only 4 or 5 square inches of footprint.
When working plaster, do not be confused with "false set" or "flash set". This is a stiffening that happens soon after mixing or placement. For example, a bucket of wet plaster will take a false set in a matter of minutes of sitting undisturbed. A bit of agitation (stirring or shaking the bucket) will loosen the mix, and restore a workable product.
Besides setting time, other mechanical properties of cement of interest to the craftsman include porosity and permeability. Porosity measures the size and proportion of volume of pores, which are microscopic voids in the material, and which will typically fill with water under immersion, like a sponge. Porosity is related to water absorption, the volume proportion of water which a sample will hold. Final strength is believed by many authorities to have a negative exponential dependence on porosity (a porous product will be weak, non-porous strong). Porosity ranges from 12 to 38 percent in Type 1 portland cement, corresponding to corresponding compressive strengths of 12 to 4 Kpsi. Porosity should not be confused with voids due to incomplete compaction, and air entrainment from frostproofing admixtures. Permeability measures how quickly water under pressure diffuses through the cement, which for practical purposes in pool plaster is always slowly enough that it doesn't matter. See Analytical Technicques in Concrete Science and Technology, Ramachandran and Beaudoin, 2001, and Concrete Admixtures Handbook, Ramachandran, 1995.
The only ingredients in today's pool plaster that are not of ancient practice are the polymers (fancy name for plastics) which are nowadays added to improve bonding, curing requirements, strength, and chemical resistance. Modern paints contain the same components. These can be present in a dry form as part of the dry mix product, or added as a liquid emulsion as part of the on-site mixing. During curing, the polymer elements polymerize into a surface coating, and in the bulk areas, they form a cross-linked polymer matrix, not unlike paint.
Common portland cement is gray in color, and this accounts for the grey color of fresh concrete slabs. The gray type is cheaper than the white, and thus is used when the finished color is not important. The portland cement used in pool plaster is a white variety, which is slightly more expensive, being made from minerals which are slightly less economical to process. This type is used not only in plaster, but in grouts and colored concrete where the white background is necessary to achieve a decorative color by the addition of mineral pigments.
No too long ago, asbestos fibers were also included in pool plaster to improve the spreadability and final strength, but this has not been allowed in the US since the mid-1970s. However, one should be aware of a possible asbestos hazard if you are grinding and chipping old plaster out of a pool dating back to the era when asbestos was quaintly considered the "wonder material" of modern times.
As an aggregate, marble dust makes plaster that is easier to work than quartz sand, but not as durable. Marble is a soft stone and subject to chemical attack, while quartz is very hard and utterly impervious to pool chemistry. So unless you're a contractor aiming for a quick and cheap job that looks good just long enough to escape responsibility, you want to use the durable quartz sand instead of marble dust.
Like pouring common concrete, working with pool plaster is cruelly unforgiving of ignorance and mistakes, both in timing and technique. You have a certain limited amount of time to mix, spread, and finish. Certain steps in the placement and troweling of the product can be performed only once.
Surface preparation is important. In construction of a new pool, the rough concrete shell is first covered with a "brown coat" of plaster. This is an intermediate layer of cheap plaster (thus "brown", or more likely the gray color of portland cement, instead of the more costly white portland cement used for finish plaster) that smooths out any roughness or unevenness in the concrete shell, and brings the inside of the shell to its smooth, final form. The layer of finish plaster, applied over a fresh brown coat, bonds well because during the first few days or weeks the surface of fresh plaster has not fully cured and remains chemically active.
This eager-to-bond property is not true of old plaster or concrete, which has become chemically inert, even if superficially etched with an acid wash. On a refinishing job of an old pool, one has the problem of bonding to the old layer of finish plaster (or in some places the old brown coat if it is exposed, or even the concrete shell). Old plaster or concrete does not bond well to new plaster, since the surface has become inert after years of curing.
An option for plaster pool refinishes is an extra "bonding layer" or "bonding coat" that can be applied before the finish plaster, on top of the sound old plaster, to supposedly improve the bond of old to new. While there are proprietary products for a bonding layer, I suspect the best is just pure portland cement with acrylic admix, mixed to a paste, and rolled on in a thin coat with a rough paint roller. The pure cement/admix yields a good bond to the old inert plaster, while its fresh exposed side (with a bit of "keying" effect from the rough roller nap) bonds well to the new plaster. The proprietary products may simply be a dry form of this cement/admix formula. I chose not to apply this extra cost and effort, since the acrylic admix in the finish plaster works in the same manner to improve the bond.
You must spend a great deal of time and effort preparing an old pool for plaster refinishing. Any loose old plaster must be mapped out and marked with a scratch awl or marker for remedial action. This mapping is done by walking around inside the empty pool, all the while bouncing a golf ball on all the surfaces, until you have the entire surface surveyed. You may be shocked at the amount of area that is awaiting this remedial action. Loose plaster is at least easy to chip out, using a small air hammer or even an old-fashioned hammer and chisel. You simply dig the chisel in at the center of a marked area, and then pry along under the loose veneer. Most of it comes right out like a crisp cookie.
Simply removing loose plaster is not the end of preparation. You must have an approximately smooth, continuous, step-free surface to properly apply the finish plaster. Any steps or other discontinuities tend to "print through" under the troweling pressure. Finish plaster is not very thick, so any unevenness below causes variations in troweling pressure, which affects the segregation process at the surface, which leaves shade variations wherever edges of steps are underneath, even though these steps are covered with new plaster. This is why the prep of the old surface involves not only chipping off any loose plaster, but filling the resulting "potholes" with cheap plaster (or at least feathering the edges with a grinder), before applying the finish plaster. Filling those holes is a good way to practice your mixing, applying, and troweling techniques, since you need only a somewhat even surface, not perfection.
You might think that to ease the preparation, you can just grind down any edges of "potholes" during preparation, and you can, saving the time and effort of mixing and applying filler patches. But grinding is a fair amount of work in itself, and very dirty and noisy. But also consider that you will either have to double up the finish thickness over such areas (costing more material and threatening your estimates), or else you can maintain an even thickness and have a wavy surface (which is likely just a problem of appearance), or at the worst, you will compensate poorly and spread a finish layer that thins out on higher areas (which will fail prematurely). So patching the potholes, instead of grinding them down, is something to consider. Remember the principle that the most economical and most durable finish layer is the same design thickness everywhere. Any area thinner than design will be the first to fail years later, and any area thicker than design will be of no use when the other areas age first.
Attempting to correct flaws in placement and finishing by repeating working the same material yields inferior results. For example, a certain amount of troweling is critical; this segregates and smooths the surface region of the plaster. Too much troweling, however, will start to degrade the surface.
By breaking the work up into tile-bordered sections, we not only split the overall job into smaller, manageable pieces, but we also have the last resort of wasting the work on a section and starting it over. That is, if you aren't happy with the results, you have some hours or a day or so to conclude your regrets, and to simply take a shovel and scoop off the fresh plaster, putting it into buckets for disposal.
As a young boy I spent many hours watching new brick houses in my neighborhood being built by old-world craftsmen. I enjoyed following their well-trained, economical efforts. How I longed to be able to just butter a few bricks, lay a few mortar lines, and tamp it all square, plumb, and level. Perhaps that unfulfilled longing had led me to take on this massive masonry project. With this plastering, it did seem at first sight that you just throw a bag and some water in a mixer, have at it a bit, pour it out, play patty-cake in the mud like you were a kid again, and repeat, oh, 40-odd times. It only seems that way if you don't routinely lift leaky bags of caustic powder that weigh a back-breaking 100 pounds and if you don't haul around even more massive quantities of what is essentially corrosive, liquid rock that must be lowered slowly into a surprisingly deep hole lest you launch a splatter with escape velocity such that it ends up forever marring the face of the moon. One discovers surprises of the "push it here, pops up there" type. It is alarming and utterly exhausting until you know what you are doing, after which it is not alarming but still near-utterly exhausting. You have a heap of hundreds of pounds of this material laying around turning into stone, when you only seem to be nibbling slowly at the edges of the job. Then it starts to rain.
It is inconceivable that anyone, no matter how smart and how generally skillful, could properly work plaster on the first few attempts, any more than any of us, no matter how well-coordinated and practiced at other athletic activity, could be expected to take off riding a bicycle on the very first attempt. Riding a bicycle is something that just about everyone learns to do; I am not so sure that good plastering is something that everyone can learn. You don't need the tortured soul of an artist, but you should have a knack for playing in the mud and crafting useful shapes and surfaces. You must understand the working properties of plaster, at least practically if not scientifically, including concepts like "plasticity" (properly mixed plaster is formable like clay), "thixotropy" (cement products flow under pressure of a tool, but then hold shape against gravity), and "segregation" (working a blend of cement and sand (or other aggregate) under a trowel tends to push the sand deeper and "float" the cement paste to the surface, allowing a smooth finish). It is a good sign if you have a strong desire to get your hands in the stuff, like the little boy watching the bricklayers.
We used Quikrete (http://www.quikrete.com) #1800 pool finish in 80 lb bags special ordered from Lowes or Home Depot at about $12/bag. The fashionable products like Diamond-Brite were far more expensive and locked in restraint-of-trade practices that prevented distributors from selling to a do-it-yourself homeowner. These products are sold aggressively by many of the contractors, but after much research I concluded that they consist merely of plain old plaster, except that the quartz sand has been coated by a dyed ceramic layer, which sand is typically a 3M product called ColorQuartz blended in by a local bagger. There may be dry polymer components added to support some of the durability claims; these dry versions are less effective than the liquid acrylic additive we used, although they are more convenient to mix when you only have a single dry mixture plus water to measure.
Apparently per MSDS the Quikrete 1800 pool finish plaster is a mix of white portland cement and quartz sand (1:3 proportion?); perhaps with gypsum (setting time retardant) or calcium chloride (setting time accelerant) added. To each bag we mixed 1 gallon of Quikrete acrylic concrete fortifier ("admix") for extra strength and durability, with about 1 more gallon of tap water to reach the right consistency. Adding this water-based acyrlic emulsion provides a 2-week air-cure instead of underwater-cure, which is good for doing the pool over days or weeks in sections. The admix also improves the bond to the old inert plaster surface. It also about doubles the cost of plain plaster mixed with water. Acrylic also seems to change (passify) the start-up chemistry (that is, what happens when you first fill the finished pool with water), so that there are no problems like plaster dust or chemistry swings to deal with. I believe the long-term chemical resistance and durability are well worth the extra cost and effort.
Note: Reports are that sometime before 2006 that Quikrete discontinued making the 1800 pool finish product, and it is no longer available. There is no good substitute in Quikrete's other products. I am also told that Quikrete now suggests their Quikwall Surface-Bonding Cement for pool finishing, which contains glass fibers, and which therefore seems unsuitable as it would trowel to a "hairy", rough surface.
Other common accelerators besides calcium chloride are calcium nitrate and triethanolamine. Carbohydrates like sugar and corn syrup are common retarders; citric acid is also sold as a retarder, which suggests that frozen orange juice (water, sugar, citric acid) may be a good one. (Just kidding about the orange juice.)
Polymers used as concrete fortifiers include styrene butadiene, polyvinyl acetate, and acrylic. Of these, only acrylic is suitable for continuous immersion.
A recipe for improvised pool plaster is 1 part white portland cement to 2 (or more) parts white quartz sand. These products are widely and cheaply available such as in my table below:
| POOL PLASTER RECIPE | ||
|---|---|---|
| Ingredient |
Parts by Volume |
Sources |
|
White portland cement |
1 |
TXI brand white portland cement Home Depot SKU 248489 Federal white cement |
| White quartz sand | 2 to 3 |
Quikrete Play Sand Home Depot SKU 169803, $3.65 per 50 lb bag (03/2013) Lowes SKU 111351, $3.65 per 50 lb bag (03/2013) Pavestone Pool Filter Sand Home Depot SKU 747181, $5.48 per 50 lb bag (03/2013) |
| Acrylic fortifier |
Add to dry ingredients to make a stiff but plastic mix. Optionally dilute 50/50 with clean water for economy at the expense of bonding strength and workability. |
Sika Latex R Home Depot SKU 143801, $11.87 per gallon (03/2013) Quikrete Concrete Acrylic Fortifier Lowes SKU 861014, $8.54 per quart (03/2013) |
Instructions with cement products advise up to 2 percent by weight of calcium chloride may be added as an accelerator, although one should be careful to dissolve this chemical in the mix water and decant out the impurities. Appropriate admixes are available as Bonsal Acrylic Additive and/or Bonsal Curing Compound (see http://www.bonsal.com/ under "Commercial Products").
Quikrete claims coverage of 35 sq ft per 80 lb bag at 1/4 inch thickness, which is what you get if you compute the geometry of the volume and surface involved. In practice, used 42 bags to cover 1300 sq ft, for a yield of 31 sq ft per bag. This was due to deliberate 10 percent over-estimating. This allowed some leeway for overuse at the start of a section, so that the end did not wind up being starved for product. This implies about $500 in material costs for our pool (which is large by residential standards) if we had been using just plaster without fortifier. Considering that commercial estimates for plastering alone ran about $5000, which is completed by a professional crew in about one day or less, you can see the profit to be had in this work is substantial if you are properly skilled, equipped, and businesslike about it.
Mixing plaster by hand in the quantities required is unthinkable. Power mixers are what make the task possible, but it is still very heavy work moving the dry materials into the mixer and then moving the mixed product to the work. (It was a big, messy job merely unloading 4000 lbs of bagged dry plaster from the pallet on the delivery truck to the work site.) Part of the difficulty is getting the mixed plaster down into the pool. Buckets of this liquid rock are massive and dense. You can't just heave it over the side into an 8-foot-deep hole without it splattering everywhere like a volcanic eruption. You must either mix it in place, or haul it down one miserable bucket at a time.
Any splattering of plaster is very time-consuming to clean up, either taking up valuable "hot" time now, or setting up and becoming much more difficult to remove later. So mixing, transporting, and delivering should all be designed to minimize pouring from any height more than a few inches, except in perhaps a sloppy area for initial mixing that doesn't need constant clean-up. The mixing crew also must take care to minimize the amount of stray material they are moving on feet and clothing to the surrounding area.
While we had been cautioned about the difficulty of skillful application of pool plaster, I planned to use the technique of breaking up the pool surface into sections of various sizes and challenges like corners and steps. In this way we would practice our techniques on the easier sections and graduate to the more difficult. This also allowed practice with the tricky timing of the process. Since plaster sections cannot be abutted with a "cold joint" (edging fresh plaster to an already-set portion), we set strips of porcelain tile in thin-set mortar onto the old surface as divisions.
Early on, it became apparent that some serious tooling for tile and stone work would be needed, including an MK-101 diamond saw, a heavy-duty air-powered angle grinder, and a set of diamond polishing disks. In the end, I had spent about $2000 for special tools on this job, but with absolutely no regrets. When it comes to tile and stone on this scale, this is the only way to get a good result in a reasonable amount of time. You also gain a splendid flexibility in being able to fashion custom pieces from the more common stock that does not carry a price premium. For example, you can cut tile strips from full tiles for about 1/10 the price of the ready-made pieces. "Pool tile" (for the waterline) is a specialty product that I have never seen sold at anything but an exorbitant price, but with a good tile saw you can cut your own waterline tiles from inexpensive porcelain floor tiles. You can cut and set mosaics and listellos from common porcelain or natural stone (marble, granite) that would cost $100's per square foot to purchase. You gain the ability to design expressive curves and practical designs into your work that otherwise would not be possible.
For power mixing, we first tried a Red-Lion electric concrete mixer from Lowes, hauling the mixer it right down on planks into the pool where we thought we could mix and dump wet mix right onto the work. We made a few practice batches out of bags of stucco which we used to patch the unsound old plaster that we had chiseled out. The stucco mix is good for practice because while it mixes and works like the pool plaster, it is so cheap that you can mix it and trowel it, but then just peel it off with a shovel and waste the material after it first sets, if you have an unsatisfactory attempt.
Lifting and pouring an 80 lb bag of fine powder is surprisingly difficult and messy, even hazardous due to the clouds of caustic silicate dust waiting to be inhaled. The mixer was not completely effective at plaster mixing because it is made simply for concrete with gravel aggregate (not smooth plaster or mortar) and would therefore leave many lumps of unmixed product in the wet plaster, which we then had to laboriously work out with trowels on the floor of the pool, all the while the plaster setting time was being used up. Mixing was rather slow at 1 or 2 bags per batch, or so we thought. Pouring out of this small mixer directly onto the work still splattered too much, even though only dropping about a foot. But we did complete our initial sections using this method. Things worked rather well and we were confident we could improve the techniques.
An experienced plasterer has since written me to explain how to minimize lumps when mixing plaster in a concrete mixer. The technique is to add the dry powder to a major portion of the water, not water to the powder, and let the mixer barrel turn over this very stiff mix for a while. As he explained the mixing of a large batch: "You start with water in the mixer. For example, If I put 2 and 1/2 five gallon buckets of water in there to start, then I throw in 8 bags of material (3 of cement, and 5 of marble). I'll end up with a very stiff mix. If you let the mixer spin this stiff mixture for a minute or two (I'm talking wet but still really stiff here) it will get rid of all the lumps. Only then, after all the lumps are gone, do you add more water until you get the consistency you want."
Being somewhat assured of our application and troweling techiques after two small sections, we wanted to tackle a much bigger section. We observed that professional pool plasterers use a 6-bag gasoline-powered mortar mixer mounted on a truck or towed behind a vehicle. This is a large machine which uses rubber-edged paddles to stir against a cylindrical tub, breaking up lumps. Delivery of the wet plaster to the pool is by wheelbarrow or concrete pump. Another handy feature of the big mixer is a coarse grate on top with a "bag breaker", a triangle of steel pointing up, which allows you to lay a bag on top of the mixer, breaking the bag's middle, and then lift the ends to dump the dry product cleanly into the tub. We rented one of these for $70/day, and sure enough we were mixing massive quantities in a few minutes. That was much faster than we could work the material; the mixing crew got way ahead of the application crew, resulting in the shoveling-out of part of a batch that set before it could be spread and troweled. We also discovered that the big mixer was not much better at eliminating the lumps. This was the most emotionally stressful time in the project, with lots of yelling and near-panic when things got close to out-of-control. You won't see any pictures of us happily working during this time. This big, middle section turned out to have the worst finish of the whole job, and required the most touch-up work later.
For our third mixing session, realizing that we didn't need 6-bag batches, we reverted to the small power mixer but some new ideas. We would use the barrel mixer again to merge liquid and dry plaster into a homogeneous, if lumpy, mix, but, we would do this mixing out on the lawn where spills would not be so much of a clean-up problem. We would transport using again the bucket method, but we would lower the 5-gallon buckets (about 1/2 bag or 50 lbs each) gently down into the pool using a large pulley and rope suspended from a ladder spanning the corner of the pool. Once a bucket was on the bottom of the pool, we would use a large egg-beater mixing paddle (sold for mixing tile thinset or wallboard joint compound) on an electric drill (Milwaukee 0300-20 corded drill, you want something geared down a lot with variable speed) to finish the mixing. After some practice this system worked splendidly. The egg-beater swirled the partly mixed plaster like a giant kitchen blender, and the lumps were completely dispersed. The variable-speed drill allowed control over the speed so as to avoid entraining air bubbles into the mix. This also allowed the holding out of wet plaster in a bucket for perhaps 15 minutes, followed by stirring to liquify the stiffening mix (the "false set" described above).
The egg-beater could even be used for all the mixing, if one carefully adds the dry mix to the liquid in the bucket. Unlike the rotating barrel, the egg-beater will easily stall if the ingredients are improperly introduced. A larger bucket would be appropriate, even something like a clean 32-gallon Rubbermaid Brute trash container. I've seen professional crews mix with nothing more than 55-gallon plastic drums and electric drills on the back of a flatbed truck.
Another mixing technique that might have worked, but which we didn't try, was to make a bottomless wooden box, which is placed on the pool floor. You mix in the box, and then lift it out. One would need a technique to carefully introduce the ingredients without them leaking out of the bottom.
We used 1/2 x 1/2 inch notched trowels to spread the initial dump of the plaster onto the work. This closely gauged a 1/4 inch thick application, which was important since we did not have much margin for error on the material coverage estimates. This notched troweling was immediately followed by several sessions of troweling with a stainless steel pool trowel. Stainless trowels are a necessity; plain steel is quickly roughened by corrosion from the alkaline cement if not meticulously rinsed and oiled after each batch.
For swimming pools, porcelain ceramic tile is the most versatile and inexpensive trim material. Also called "vitrified" ceramic tile, this carries a 0 to 0.5 percent water absorbtion rating (WA), and is very hard, strong (such that you can't snap a 3/8 x 3/8 x 3 inch piece in hand), durable, and suitable for underwater use. Higher WA is not good for underwater or especially waterline use, where the porosity can collect permanent stains, discoloration, or lime deposits.
Pale, neutral, undistinguished tile patterns would seem to be best for aging characteristics of the glazed color (and designs, if chosen). Tile glaze is colored with mineral pigments that are very stable in exposed weather and sun, but the cheaper glaze such as is applied to terra cotta tiles (not that terra cotta is at all suitable for pools, being about the worst WA of all tile) will not hold up for decades without getting crazed and dingy. Pleasantly bland porcelain tiles will probably still be pleasantly bland long after our lifetimes.
I used an initial supply of tile for the waterline and most section lines, which was a generous 3/8 inch thick. Later in the job I used a thinner tile that was 1/4 inch thick for some of the section lines. This later tile was the best match available to my initial selection after I exhausted my initial supply and discovered initial tile style had been discontinued and sold out.
Granite is eminently suitable for underwater pool use. It is a very hard, non-porous stone. Granite, however, is expensive, and the better-looking species of granite are even more so. It used to be hard to even find a supply, but it has gotten very popular lately for kitchen countertops and other home decorating uses, so you might find a local supplier, or even find scraps that are unusable in a kitchen but perfect for cutting on a tile saw for pool trim.
Marble is not suitable for underwater use, because it is porous, soft, and chemically reactive. Tumbled marble and travertine are poor cousins to polished marble, and these add a rough surface to the list of unsuitable qualities for underwater applications.
I did use marble for the above-water coping, where it has done very well. Marble, being porous, when used outdoors in the weather, will tend to pick up stains, such as from from rainwater carrying leaves and their tannins. Design the marble layout such that it does not contact puddles or other standing water. Butter the backs of marble stones completely with thinset, and use a polymer-modified thinset (such as the Mapei product I used, described below), so that water underneath does not promote staining. The thinset should also be labeled for use with marble, as some thinset can leach color into the porous stone.
The "wedding cake" style steps on my pool took a major effort to chisel down to the concrete foundation, which was buried under a few layers of old plaster and gobs of plaster filleting in the corners. Once the bare concrete was exposed, I spent a lot of time thinking about how I would like to rebuild the pool entry, which is the most prominent of a pool's various features.
While I have seen many pools where the steps were all finished with plaster alone, steps edged in tile or stone are better not just for the decorative touch, but because a sharp-cornered step provides a surer traction underfoot compared to a blunt plastered corner. The old finish had used bullnose corner ceramic tiles that were both slippery and blunt. Porcelain floor tile is also rather slippery underwater, as would be polished granite tiles (although perhaps you could use the unpolished back side as the exposed side?). I settled on using an low-grade type of slate tile imported from India and sold at Lowes. This provides a toothy, rough surface which establishes a sure tread underfoot. It also is a whimsical reference to our previous home up north in the Fingerlakes region of New York State, where the beautiful gorges were edged in loose layers of slate.
If you look at the photos above showing the slate-covered steps, you can see that I laid out a series of interlocking keystone shapes, cut from the original 12-inch squares on the tile saw. Planning such a layout takes careful work, where you make a paper template of each step surface, and lay overlapping whole tiles over the template on a flat floor. This lets you select a number of tiles and their interlocking pattern such that you have nothing smaller than half a tile anywhere, and an approximate symmetry to each level, while covering each step completely. I snapped off pieces of 1/4 inch wood dowel and inserted them as spacers while setting the tiles to get the even spacing between the oddly angled joints. The slightly rounded and smoothed outside edges of the tiles were approximately cut as polygons on the tile saw, and then faired and chamfered with the angle grinder.
This Indian slate goes against my rule about not using porous stone underwater, but it has endured very well over the years. The tiles exhibit some cleavage flaking out of the box, which I worried would progress after installation, but this has not been the case. Being a dark grey shade, if they have picked up any discoloration or stains from the porosity, it has not been at all noticeable.
You don't need special materials for the masonry work of setting tile or stone in a swimming pool. Grouting between tiles above or below water can be done with ordinary cementitious grout mixes, which are essentially white portland cement and fine sand.
While just about any cementitious thinset will do for setting tile, some are stronger and easier to work with than others. I used the Mapei (http://www.mapei.com) ceramic tile premium thin-set mortar kit, which contains 25 lbs dry mortar plus 1 gallon of liquid additive. You can also buy these components separately. The additive seems to be an acrylic emulsion plus significant accelerator(s). This alters the consistency of the mortar to be more like a sticky peanut butter, which is very helpful when tiling vertical surfaces. Ordinary thinset tends to have a loose, oatmeal-like consistency, which makes it hard to use on anything but a horizontal surface. The bonding strength of the acrylic-modified mortar is enormous. Small panels of heavy marble cover an area with shear strengths in tons.
I built special scaffolds to hold the heavy marble slabs precisely and rigidly in the wet mortar against the coping fascia. There were two types of these scaffolds, one for the long straight sides of the pool, and another for the curved corners.
The main horizontal members of the straight scaffolds were 10-foot lengths of galvanized steel Superstrut. This product is sold in the electrical department of home improvement stores. It is straight and rigid, and does not deflect appreciably under the weight of the freshly set stone.
The curved scaffold portions, which I called "molds" (in retrospect, the casting term "plug" might have been more fitting), were 2x4's which I bent and molded to follow the exact conjugate shape of the inside of the coping curves. These curves were the somewhat random result of less-than-precise construction, and therefore had no circular or other geometric regularity that could guide a cutting model. A power saw (table saw, radial arm saw, miter saw) is needed. One must first set the depth-of-cut to cross-cut nearly through the 2x4, leaving just enough at each cut to allow the wood to hinge slightly without breaking. Each cut must be 90 degrees cross-cut, to keep the mold curve aligned in the horizontal plane. The spacing of the cuts along the length of the mold must be frequent enough to allow the mold to curve sharply enough to follow the curvature of the coping. In my case I would first cut about every 2 inches, do a trial-fit, and add cuts as needed to accommodate the slight unevenness to the coping curve. Once the mold piece was cut enough to allow the try-fitting to press all the way into the curve, I fixed the curvature into the mold using hot-melt glue. I injected hot-melt glue into a few of the hinge cuts, pressed the hinged mold against the curve, and waited a minute for the glue to cool and set. After all the hinges were glued, the mold was rigid and an exact fit to the coping curve. I drilled a few 3/8-inch holes vertically into the mold to allow a loose fit of the 1/4-inch threaded rod suspension. If one had a wood-cutting bandsaw (I didn't at the time), or the patience to use a hand coping saw (I didn't then and still don't), then it would have been easier to trace a paper template of the conjugate curve, and transfer that shape onto plywood for cutting.
Whether straight or molded to a curve, the scaffolds must be suspended out and over the coping with enough clearance on all sides to allow the spreading of mortar and insertion of the stones. I hung both the straight (Superstrut) and curved (molded 2x4) scaffolds from adjustable cantilever devices I improvised from 2x4 lumber, 1/4-inch threaded rod, nuts, and washers. I first cut 2x4 cantilever segments of about two foot length, and arranged them to hang about an inch above and a few inches out over the coping on scrap wood blocks placed on the deck. I put heavy buckets of sand on the cantilevers to hold them in place; this allowed adjustment in the horizontal plane. Once the straight struts or curved molds were hung roughly in place on the cantilevers, I could adjust the scaffolds precisely up and down by turning the nuts on the threaded rods. It would have been more prudent to make rough plywood footings for the cantilevers, which would be held down by sandbags, since the bucket-and-blocks footing was constantly in danger of accidentally being kicked over, which would result in a disastrous collapse of hours of stone-setting and the breakage of many dollars worth of stone.
I built enough of these scaffolds to support the amount of marble I thought I could set in one session, plus two units to bridge to the adjoining work already set, and moved these sections along as the work progressed. Since the length of the straight coping runs were not exact multiples of the straight strut sections, entering or leaving each corner required some retrograde placements of the scaffolding. Since the curved paths of the coping at the corners were all slighly different shapes, each corner required its own molded scaffold.
The traveling continuity of the scaffolding thus dictated a minimum of three 10-foot Superstrut sections, and four molded corner sections. The leveling and vertical placement takes some care and planning, since you are dealing with both a deck that has some unevenness, and with the constraint that the level of the stones at the end of the setting must loop around to join to the level where you started setting. The overhanging design of my coping did not permit striking chalk lines on the mortared surface, and thus I had to reckon upwards from references I scratched into the old plaster below. I used a water-tube level to carefully check and recheck the levels before starting, and several times during the fascia work. (Similar techniques were important to accurately setting the waterline tile.) Any out-of-level accumulation would be painfully obvious against the perfectly-level water surface, not to mention a uneven joint at the start/finish line. This all would have been easier if the cheap laser levels sold these days had been available then. Instead, I (re)invented a lot of techniques that I suspect the ancient Romans would have recognized.
The old base plaster at the waterline must be undercut to transition to the tile and various fittings. One "feathers" and undercuts with masonry disk or cup wheel on angle grinder. An assistant can spray water on the grinding area to minimize dust, or you can attach some 1/4 inch copper tubing (or better yet, some Loc-Line) to the tool, fed by a garden hose. This makes for significant electric shock hazard if you are using an electric grinder; use double-insulated tools on a GFI outlet and keep water away from body of electric tool, or better yet, use a pneumatic tool. When working on horizontal surfaces, it is not too difficult to keep the electric tool dry, but vertical surfaces make this difficult, compounded by the fatigue of holding up and leaning on the tool for long periods. You may, like me, receive several small electric jolts. Good rubber gloves seemed to help. Wear dry, insulating footwear.
Feathering the old surface is intended to remove all rough corners and any but very gentle undulations in the old surface. Otherwise such bumps "print through" the new plaster when troweled since they induce distinct areas of higher pressure under the trowel. Feathering also provides a certain minimum thickness (1/4" or 3/8", whatever your target thickness is) of new plaster abruptly butting up to the edges of tile, fixtures, etc. You must chip and grind off enough old plaster to achieve these goals. This is a tedious task, and no shortcuts are available. The sculpting job may be complicated by areas of loose plaster that have been removed.
Some have written me in hopes that a pressure washer could be used to prepare the old surface with much less effort than manual chipping, grinding, and etching. It just is not so. A pressure washer can remove some loose material, but it is not going to do it thoroughly; it essentially removes only what would be very easy with a hammer and chisel. Sorry about that.
I started out with a monster Makita 9067L 7-inch electric angle grinder, which provides a 5/8-11 spindle thread for big masonry disks and the standard diamond polishing pads. Because of the wet environment for polishing, having received a few electric "tingles" from the double-insulated tool into gloved hands, and due to the effort required to hold the grinder up against vertical walls for long periods, I eventually switched to using a 4-inch air angle grinder (Husky H4740). This is a much lighter tool, and eliminates the electric shock hazard. This model seems similar to the Universal UT8740 (made by Florida Pneumatic here in Florida). Harbor Freight's 95504 seems like a similar tool in an import-clone version. The 4" angle grinders typically have a 3/8-24 spindle thread, so make sure it comes with (or has available) an adapter for the 5/8-11 spindle thread used on masonry disks and diamond polishing pads, or be prepared to make your own adapter (which I did by drilling and tapping a 3/8-24 hole in the center of a piece cut from a 5/8-11 bolt). The "3/8-24" spindle means 3/8 inch diameter with 24 threads per inch (a standard UNF fine thread for bolts) and "5/8-11" means 5/8 inch diameter with 11 threads per inch (a standard UNC coarse thread for bolts). Some grinders use a 10mm metric thread on the spindle. A metalworking lathe is just the thing to make any of these spindle adapters you might need.
Air tools, like the hammer and grinder I used, hold up well in wet environments. I don't know that they can withstand actual immersion, since this would soak the bearings and turbine in water, but the positive exhaust pressure means there's no trouble just splashing water onto the tool. Compressed air is loaded with 100 percent humidity and condensed liquid water anyway (unless you have an expensive refrigerated dryer, a very nice thing that will improve your air tool performance and longevity), so some water in the tool is normal. Air tool oil contains a lot of additives and detergents to maintain lubrication in the presence of severe moisture inside the tool. To store the tool, I would dry off the outside and run in some fresh oil. After many hours of this very wet use (when performing the wet polishing) I didn't find any problems at all beyond normal wear and tear.
Hard ceramic tile, slate, and plaster all easily cut with the edge of an angle grinder masonry disk. This is not a good substitute for a real tile saw, but it will work.
Filling and patching holes in the rough base coat plaster when applying the finish coat plaster is possible, but difficult, if the area is large (more than about 6 inches across). It is better to patch the base coat so that it is all even before you start the finish coat. Cheap bags of gray base coat stucco plus acrylic work well for rough base patches prior to applying the finish coat. Screed with a metal straight edge to get even coverage. Use a broom finish after the initial set, like finishing a sidewalk, to enhance the bond ("key") to the finish coat. The patch transition can be left rough on the base coat.
Section tile lines are borders that allow you to work in manageable portions that can be finished in one day's work by a few people. However significant additional work is required to plan, cut and lay the tile, and for edge treatment (cutting in and cleaning up) of the wet plaster, which must be done twice (two plastering sessions smear onto any section border) of every line.
The hardest problem in plastering technique is pacing the mixing and application given the crews' abilities and skills. You must plan the application pattern to not work yourself into a situation where the older wet plaster meets new, which results in a "hot" joint that is difficult to work. In other words, you don't want to be spreading fresh plaster up against that session's earlier plaster placement that has been setting up for a while and taken an initial set.
Over-troweling an area results in what the trade terms "trowel burn", which appears as a kind of grey cloudiness in a pattern that tends to follow high spots and ridges of the underlying base. There seems to be some confusion amongst experienced plasterers about what exactly causes this, but my analysis is the following. Troweling is normally a progressive technique applied at various times during the set, using different trowel angles and pressures at each time, whereby a skillfully applied degree of segregation of the aggregate and cement is graded progressively towards the surface. I believe the increased pressure concentrating under the trowel at a high spot selectively segregates the quartz aggregate and brings it to the surface. This is part of the reason for feathering any transitions in the rough base. Polishing (tedious and expensive) after the set repairs trowel burn, if sufficient thickness is available.
50-grit diamond disk polishing is very effective to correct many troweling errors. This may be the do-it-yourself-plasterer's best friend: it can turn an amateur result into one smoother than any professional can make with a trowel alone. The disadvantage is that diamonds are not just a girl's best friend, but expensive. And polishing with them is faster than polishing with anything else, but still time-consuming.
A series of these diamond disks in a range of grit sizes are typically used on interior work for polishing marble floors and granite countertops by a very specialized trade. Disks consist of diamond grit in flexible resin (a hard rubber, likely polyurethane), with Velcro attachment to a rubber disk with a brass 5/8-11 threaded socket for attachment to large angle grinder. These cost me $40 per 5-inch disk, and I wore out two disks correcting a large portion of 1300 sq ft. Small ridges and roughness (positive or convex errors) very easy to polish down. Masonry disks are cheaper, and will also grind down plaster, but are rigid and therefore leave crude grinding marks; the flexibile rubber diamond disks mold to the undulating surface and truly remove the undesirable "high spatial frequency" characteristics of the surface while not wasting effort on the "low frequency" or adding tool "noise" (grinding marks or ridges). One can achieve a perfect, terrazo-like finish if desired with the diamond polishing.
The diamond disks absolutely require a generous water feed, to lubricate, cool, and reduce dust. Air angle grinders with water feeds on the center spindle are expensive ($400 vs $120 for a regular air angle grinder). One import was advertised for $180. We used a regular air angle grinder with lots of continuous rinsing from a helper with a garden hose (later I thought of the copper tubing attachment). The slightest interruption of rinse water quickly erodes the costly disk (you see the precious brown resin rubbing off on the work). Rinsing required a patient, attentive helper and no doubt consumed diamond disks faster than the center feed, but as a trade-off this was thought to be less expensive than buying the tool for one job. Take care not to flood rinse water into the air tool exhaust as this clogs the tool and requires clearing. It would be clever to somehow retrieve the cast-off diamond slurry from the rinse water, and recast it into new rubber pads, but this also isn't practical.
I don't know whether it would be possible to use an air angle grinder underwater for refinishing existing plaster. One dealer claims to sell an immersible version and says any other would be ruined. However, shop air is typically water-contaminated and air tools lubricants take this into account. Underwater use would introduce oil and junk from the air supply into the pool water, not to mention the diamond grit, resin, and ground-off plaster. For anything but a small area, draining the area would seem to be preferable.
"Torn" areas of troweling (myriad of pinpoint holes) and other minor negative/concave errors can be filled with unsanded grout on a rubber grout float, allowed to set, and then polished down. This is analogous to the Bondo body-work technique of multiple coats of progressively finer finish, interspersed with polishing.
The final chore in all this turned out to be fixing leaks adding up to one inch of water per day in the pool that persisted even after the painstaking work of replastering. I agonized over whether we had missed some spot on a drain fitting, or whether some crack or other problem had gone unnoticed behind the waterline tile. Pool leaks may also be caused by leaky pool plumbing or leaking pool equipment some distance from the pool itself. After some months of tedious measurements and waiting for the level to leak down, I finally suspected that the underwater light niches were the culprits. Attempts to use dye to pinpoint the leak source was ineffective. I decided to repair the fitting where the electic wires enter the underwater light niches. These fittings consist merely of a 1/2-inch through-tube through which passes a watertight, flexible cable, and which tube is then filled with a special caulk suitable for continuous immersion. Through Web research I learned that virtually no caulk other than a costly 3M brand 5200 marine adhesive sealant (100 percent polyurethane, P/N 051135-06500, $18/tube!, sold at home-improvement stores, paint stores, and boating suppliers) is suitable. On manipulating the old caulk out of the fittings I discovered one which had a significant back-pressure of water behind it, suggesting a long-time leak. After re-caulking the fittings, and waiting the 7 days (!) for the 3M material to cure, I refilled the pool and anxiously waited for leak-down measurements. To my gratification, the leakage stopped. This leakage must have been chronic for many years, since we use virtually no make-up water now like we used to.
One question which usually comes up in pool refinishing is how thick the new plaster should be. Some contractors will try to manipulate the sales process using thickness as a measure of quality.
Thickness alone is a misleading specification. 1/4 inch is the thinnest practice, 3/8 inch is more typical, and 1/2 inch is a bit overdone. The only purposes of having thickness at all is (1) to have a veneer layer strong enough to hold itself together, which means at least about three times the diameter of the largest aggregate in the mix (the aggregate being sand grains, or perhaps pebbles), and (2) to maintain this strength as long (but economically speaking, not longer) than the troweled surface finish will last. An extra-thick, extra-strong, well-bonded layer of plaster is not economical if its surface ages into a rough condition long before the structure starts to fail. Vice versa, a thin layer that starts to fragment while the surface is still smooth is likewise not economical. The best economy is achieved by a balanced aging design.
Ideally, all the inevitable age-related failure modes should occur at the same number of years out. Extra durability in only certain characteristics is of no practical value. The same can be said about a balanced design for house paint (checking vs fading vs mildew should appear at about the same age) or for an automobile (engine, body, paint, and interior should wear out about the same age).
This is why "thicker" plaster, as a nominal target, is not necessarily better; the only thing that counts is the thinnest variation from the target actually acheived in the application. What is the thinnest region that a contractor can guarantee? Typically there is no such guarantee, and only a nominal target. A job specified to be 1/2 inch may have 1/4 inch thick or even 1/8 inch thick regions if ineptly applied, and then you really have no better than a 1/4 inch or 1/8 inch job, even though you paid for 1/2 inch. A thicker specification is more of a leeway to insure that the thinnest regions last as long as the whole job should.
How much of this variation will occur in a particular job depends on the skill of the crew and even on uncontrollable factors like the weather. Very often you see plaster pools showing middle-age "bald spots" in a few rounded patches here and there in a pool after some years while the rest is all in good shape. The reason becomes obvious: the original application of plaster was troweled too thin in certain areas, perhaps to only 1/8 inch or less, by inept or hurried application. Most economically, you want the same even thickness everywhere, so the whole surface ages evenly and you have no "weak link in the chain" to fail early and ruin the otherwise sound job.
There is no non-destructive way to test the actual thickness of freshly finished plaster. It all looks good when new, and even thin spots can last years. You can't chip out samples everywhere to do a survey of realized thickness. If you were suspicious and trying to prove a flawed job, you could drill small sounding holes for inspection, which could be filled in, and still have a good bond if done within a day or so of the application.
You as the homeowner are stuck with the 5 or 10 years of lost lifetime if you have a few thin spots hidden that wear through prematurely. Since this may take 5 or 10 years to occur, you are past the time when any warranty is going to be practically enforceable. Long-term warranties (more than a year or two) may be promised in the contract, but in real life it is rarely possible to make a successful claim.
Ideally the thickness would have no variation, but this is never the case, and how much variation there is depends on the skill of the plastering crew. The pro crews around here don't carefully gauge the thickness as we did with the notched trowel technique, they depend on an eyeballed, seat-of-the-pants estimate using rough proportions of buckets or barrow-loads into a given area, which they then attempt to spread evenly by nothing more than feel. Quite often this casual technique does not succeed, in my observations of older pools.
I suspect one reason why the contractors like the wet-cure process (where they start filling the pool as soon as they finish troweling) is that it prevents you from inspecting the job closely! From a distance and under water, it always looks great at the end of the day.
One simple condition will at least give you confidence that your plaster is nominally the right thickness. If you have a contract for a certain thickness, be sure to see the contractor's calculations for how many bags will be required, based on the yield volume per bag (which should be marked on the bag itself or listed in the supplier's literature), and the square footage of application. Then write into the contract that the empty bags actually used will be available for inspection after the job is complete, and make a few visual checks before, during, and after the mixing. Watch the delivery of wet plaster into the pool, and the troweling, and observe that there are no large areas of obviously heaped-up extra thickness (which would have to be matched by thinner areas somewhere else), and that there are no large volumes of wasted or discarded plaster.
A competent contractor will not object to such scrutiny. Be suspicious of a contractor who doesn't want to be observed (a trick excuse is, "our liability insurance doesn't allow the homeowner in the work area"), or who will not make a simple accounting for materials expended.
I get a lot of questions about how to patch areas of the finish plaster. The need may arise from flaws in the original application or from damage that happens later. Sometimes there is a small area or two of the plaster needing replacement some years before the whole job must be done.
Several aspects make patching difficult. Some professionals will tell you it can't be done with good results at all, or they may tell you it can't be done properly by the do-it-yourselfer. In fact, you can do it yourself with good results, if you are willing to invest in the right tools and spend some time learning the techniques.
Patching is only practical if you have a small portion of the surface that is flawed, which is surrounded by a thick, sound layer. If you dropped something heavy into the pool and took out a chunk of plaster, or if you had a "bubble" of plaster that debonded ("popped off"), then patching is appropriate. If half the pool has gotten rough and thin, then patching is not practical. Like weeds in your lawn, it doesn't take a high proportion before the cure is tantamount to a total re-do.
The chief difficulty in patching is just in getting a smooth, clean transition from old to new. If a patch is rough on the surface, it will collect dirt and build up algae, turning quite ugly over time. The goal is to have a slick, smooth surface everywhere immersed in the pool. This means you either have to trowel a smooth transition to start with, or else correct a rough transition with abrasive polishing, or some of both.
When you trowel all-new plaster (a mix of fine cement and sand) the surface becomes smooth because the trowel pushes the sand down into the bulk of the material, and a thin layer of fine cement "cream" then "floats" to the top. Sand is a necessary aggregate in plaster, because a plaster of pure cement only would crack and check from shrinking over a patch of any size. The sand is what aggregates in the cement to avoid shrinkage during curing. (This is also why you must use sanded grout between tiles when the spacing more than about 1/16 or 1/8 inch.)
Because of this sand content of the plaster, you can't smoothly feather the patch to transition over an old edge using a trowel. If you try to trowel a thin feather edge of new plaster over the old hardened plaster, the sand granules with catch and roll under the trowel, leaving a very rough surface. If effect, the sand granules impose a mininum thickness on any feathering attempts, so thick that you can't actually feather at all. This is why experienced plasterers will tell you that "cold joints" (butting new to old plaster) won't work, and that patching old to new plaster can't be done. It isn't a problem with getting a good bond, it is a problem of smoothing the transition.
It is not unlike trying to "trowel" a thin layer of chunky peanut butter on a hard cracker with a table knife. You might be able spread the stuff evenly and get it to stick to the cracker, but if the layer is thinner than the chunks, you cannot possible get the surface smooth.
This "minimum thickness" principle is related to why you cannot simply "skim coat" old pool plaster with a paste of pure portland cement and no aggregate. You might naively think that a skim coat would be relatively easy to apply and would rejuvenate the surface of your old plaster. If you were to attempt this, and the layer of new cement was applied thin enough, and the old surface was sound, the new cement could conceivably set and bond OK, instead of shrinking and peeling off like a thicker layer would. But the problem is you have an old surface that is rough and/or uneven (or else you would not be fixing it). Thus you cannot possibly get by with just a very thin layer of new cement paste. The new layer has to be thicker here and there to fill in and level the unevenness of the old surface. And whereever that new cement paste is at all thick, it is going to crack and pull off as it sets, or otherwise fail due to shrinkage.
So your plaster must must have aggregate. Having aggregate requires you also have a minimum thickness. Having thickness, over a large area, means that you will have massive amounts of material to mix, move, screed, and finish, on a strict schedule.
While the ancient tools and techniques do not permit good patching or "cold joints", modern tools make it possible, even for the do-it-yourselfer. The key technological innovation is the diamond-grit polishing pad. For the budget-minded, a masonry grinding disk will also work, although with lesser-quality results. The magic of the diamond pad is that you have a soft and rubbery polishing device, which yields and conforms to the curves and variations of the surface being polished, yet this same soft disk grinds off the hard plaster, because of the diamond grit embedded in the rubber. This yields a result which is not only smooth on the microscopic level, but smoothly conforming to the general curves of the pool shell.
The technique requires an angle grinder with masonry disk, and optionally a diamond polishing disk. First you use the edge of the grinder disk to cut a clean polygon edge around the area to be patched. Make these cuts perpendicular to the surface or slightly beveled out. Chip out the old plaster inside these cuts, so that you have at least 1/4 inch of depth to be filled by new plaster right up to the squarely stepped edge. Then you fill in the patch area with new plaster, leaving a rough transition over the stepped edge, somewhat higher than needed to finish, and troweling the center as smoothly you can. After this sets, polish down to smooth the patch and transition with the flat disc of the grinder (hard to get perfect results), or with a diamond polishing pad (makes for perfectly smooth results).
The diamond tool is wonderfully effective if you can afford it. I had to chip out and patch a few "bubbled" areas on my new plaster, and since I had leftover material for an exact color match, the polished patches are invisible and perfectly smooth to the touch. (In fact, the most expensive luxury pool finishes are diamond polished after being troweled.)
The angle grinder and masonry disks are available at big-box stores like Home Depot or Lowes. Import versions are available cheaply at Harbor Freight Tools, either by mail-order or at their retail stores.
I used a diamond wet-polishing pad and backer (the "DIA-PLUS Velcro Backed Diamond Premium Polishing Disc" in 50 grit and 5-inch diameter, P/N PDP50050, for $40, and the matching Velcro backing pad P/N VE0005, for $15) from the online Diamond Tool Store (who happens to be here in West Palm Beach, but no connection to me). These fit the standard 5/8-11 thread on larger angle grinders. The pads come in various sizes and grits, and are typically used for installing marble tile floors or granite countertops. The coarse 50-grit is all you need for pool plaster, where you don't need a mirror finish. If you are polishing a concave corner area, you will need a convex disc instead of the flat disc, in perhaps a smaller diameter. It is truly amazing how this diamond abrasive rubs off hardened cement plaster like it was chalk.
These diamond pads are designed to work with a stream of water pumped through the tool spindle. The rubberized pad will quickly be ruined without water to buffer and lubricate the surfaces. Since I didn't want to invest $400 in the air-operated angle grinder specialized with a water feed channel in the spindle, I had a helper direct a small stream of water from a garden hose onto the surface being polished. This is slow and clumsy compared to having the spindle water feed, but for a one-time job it performs adequately. Lately it occured to me that one could attached a water feed line to the tool, connected to a length of flexible tubing (Loc-Line would be just the thing) mounted on the air tool itself, ending with a nozzle pointing a stream of water to the disk edge, eliminating the need for an attentive helper to keep the polishing disk flooded.
Of course the pool must be drained and extreme care taken to not get the electric tools wet. Even with the best of care, I still got a few jolts through my gloves when using the electric grinder. Once I saw the benefits of this polishing technique, I bought an ordinary air-powered angle grinder to eliminate the electrical hazard, and polished all kinds of rough spots off my plaster.
To obtain a small amount of patching material, you can select from the many colors of cementitious tile grout at the big box stores, perhaps blending two shades of white to try to match the existing plaster shade. While a diamond-polished patch may yield a perfect surface, the patch material will likely be a slightly different white color. Since an exact match is unlikely (and the eye is very sensitive to abrupt changes in shade), aim for a patch color slightly lighter white than the old plaster, which is less objectionable than if the patch were darker. It is hard to judge these shades, especially since the dry grout powder and finished material do not quite match, but the color charts given away at the store are a help.
There is some experience needed for doing this kind of patching work. It is more complex and tricky than the original plaster work, but the less massive quantities involved are less of a burden. You must understand the basic chemistry, properties, mixing, and handling of cement. But the wonderful thing about small areas is, for the patient do-it-yourselfer, FEAR NOT: If you foul up or don't like the results the first time, you can easily scrape or chip out the attempt and repeat until you get it done to your satisfaction, because cement takes many days to reach its final strength. If you have a bent to craftsmanship and put in the effort, you can get good results. You can probably set yourself up for patching with about $100 to $200 in tools and materials, and some hours to practice and figure it all out. Considering the many $100s or even $1000s for professional patching, this can be a genuine do-it-yourself money-saver.
A properly constructed pool has a hydrostatic relief fitting near the deepest point. This fitting is simply a opening (hole) through the bottom of the concrete pool shell to the earth below, plugged with something like a 1-1/2 inch thread PVC socket and plug. Sometimes the box making up the bottom drain and grate incorporates this plug to the outside earth. If you don't have this fitting, you should consider drilling the hole through the concrete and installing the plastic fitting with some quick-setting cement to fill and seal the gap. Drilling that big a hole is best done with a diamond-tipped hole saw in a powerful drill, which are some expensive tools.
This relief port is needed if you have high groundwater. By opening the port, you relieve the pressure of the groundwater upward against the outside bottom of the pool shell. This also lets groundwater flow into the pool, and without the catch basin your entire deep end then fills with a wide, messy pond of dirty groundwater (as shown in that first photo above, where the box has overflowed and the sump pump has been removed). This groundwater basin and pump keep the pool shell relieved of hydrostatic pressure and the inside of the pool basin dry of groundwater. (This assumes your pump stays working and that it pumps faster than the groundwater flows in via the relief port.)
Before the new plastering started, I plumbed the hydrostatic relief fitting into a plastic tub as a catch basin, and put the sump pump in that, so that the dirty water didn't contact the pool surface. When you have pumped out the pool and open this plug, ground water should well up, assuming you do not live in an arid area or elsewhere where the water table is very deep.
Our ground water has lots of iron in it, and it will stain any fresh plaster with rust, so you either take your chances plugging the relief when you start to plaster, or you need a system to isolate it from the pool surface. See my page on improvised bulkhead fittings to see how I made an inexpensive catch basin from a plastic storage tub.
Since my hydrostatic relief fitting was female-threaded PVC, I connected the tub to the relief fitting with PVC pipe and a flexible (Fernco type, rubber) coupler and hose clamps. The rubber coupler also flexes to let you move the tub around while working on the surface underneath. A longer piece of large-diameter, flexible hose that fits the PVC pipe fittings would do an even better job letting you move the tub around, instead of the Ferno coupling.
The catch basin not only collects the dirty groundwater and isolates it from the pool surface, it also improves the cycling rate of the sump pump. It also prevents you from having a large area of the bottom of the pool basin underwater, and thus inaccessible to repairs. One complication is that this doesn't remove rainwater (or rinse water) collecting in the drained pool, so I used a mini-pump down in the bottom drain box to manually transfer rain or rinse water into the catch basin, then up and out of the pool via the sump pump. More on that wash pump will be found in the next section.
Another complication is that if the sump pump fails (and they or their hoses do fail in various ways), your pool will flood with the dirty water, unless you fabricate a tall enough catch basin (above the water table). A tall basin will just fill until it develops enough hydrostatic pressure to balance the ground water pressure, stopping the inflow. Of course then you have lost the protection against the hydrostatic pressure outside the pool, but at least you have a chance to catch the failure and start your back-up pumping plan.
The risk of a pop-out seems to be an overwrought concern. The fears are fed by contractors who want you to think you risk destroying your pool by not paying them to do the work. This need not worry you if you make some simple observations and calculations. You may find that you have only a foot or less of water in the unpumped catch basin, due to a low water table. If that's the case, you don't need to keep the relief open.
You can estimate the buoyancy of the hydrostatic force based on the static pressure for the unpumped equilibrium depth times the area covered. If the buoyancy exceeds the weight of the concrete (calculated based on the area of your pool walls times the thickness times the density of concrete), then it is prudent to relieve the pressure. Example: My 18 by 36 foot pool has a surface area of about 1200 sq ft, and conservatively assuming a 4 inch thick wall, this gives about 400 cubic feet of concrete, or a total mass of about 60,000 lbs given 150 lbs/cu-ft density of concrete. If the area of the deep end filled with ground water was, say, about an 18 foot diameter circle, this would cover an area of about 250 square feet. For that area to develop a buoyancy of 60,000 lbs to start lifting the pool would require a pressure of 60,000/250 or about 235 lbs per square foot or 1.6 psi. Hydrostatic water pressure is 0.43 psi per foot of depth, so it would take about 3-3/4 feet of water to buoy the pool. This is roughly half filled at the deep end. This estimate does not consider that the buoyancy is concentrated on the deep end, or that the deck and backfill add anchoring forces to the pool shell, but as an estimate it is a way to know that you are safe at a foot or two of groundwater.
A cheap sump pump is appropriate for the groundwater box. Sump pumps are efficient and cheap, but need some inches of water to work, so thus the need for the catch box. The cheapest types are also are not submersible, with an exposed motor on top of a post. This presents some additional shock hazard if the pump were to fall over or otherwise get wet, so you should arrange and secure it to the box in such a way as to prevent that. Wet environments amplify shock hazards, and acid-laden water is an even better ionic conductor than plain water. You should be handling the live AC connections only at a dry area outside of the pool basin, not while you are standing in the pool basin. Don't drape a live AC extension cord down into the pool and plug in your pump (or tools, for that matter) while your hands and/or feet are wet. You should also be using a GFCI outlet for all power in and around the pool, or at least a GFCI extension cord if you don't have a GFCI outlet.
This groundwater sump pumping is all in addition to the pump you would have in the bottom of your pool to pump out the deep-end pond of dilute spent acid from acid washing. I'll describe that acid-wash pumping in the next section. This spent-acid-wash pump should be the type that can run constantly and run dry, and ideally should sit down in the grated plastic box that incorporates your bottom drain (assumed your bottom drain is properly fashioned with such a box), which then acts as a miniature sump basin. This pump doesn't necessarily have to keep up with the spent-acid-wash you generate, as long as you keep the wash diluted enough to not etch the deep end too much while the pump catches up. By the end of the job, or whenever you want to take a break, you're washing down the pool with a garden hose sprayer to flush all the acid down to the deep end and then to let the pump scour all the acid-laden wash out of the pool.
Again, this pump and box are optional depending on your need and ability to relieve the hydrostatic ground water pressure. Another pump is necessary to get the spent acid wash and clean-up wash out of the pool.
Acid washing is not as difficult as I supposed. I would dilute the pool acid (31.25 percent HCl, hydrochloric acid, muriatic acid) about 1/3 strength in water in a 5-gallon bucket, and spread it around with a broom-handled brush, or pour a small amount out and brush it around. After it instantly etches the plaster for about 30 seconds, you rinse it down with fresh water from a hose, equipped with a pistol-grip sprayer nozzle that shuts off reliably. Meanwhile, the sump at the bottom is collecting the spent, diluted acid and ejecting it in cycles from the pool.
The hydrochloric acid is hazardous to work with, but manageable with proper technique. Read the labeling on the acid container, and the MSDS from the supplier, to understand the hazards and how to manage them. The fumes from full-strength acid are noxious to your nose and lungs, and corrosive to any metals in the vicinity, but not toxic (your body produces this acid). Eye protection and great care in handling are in order, since the slightest droplet into the eye will cause an instant injury. Have a rinsing facility immediately at hand, such as the rinsing hose you are going to need anyway, and some kind of emergency eyewash bottle. Slight splashes onto the skin are immediately uncomfortable, but a quick rinse will take care of them. I have been amused watching the professional plastering crews routinely rinsing dried plaster off their hands and arms with dilute acid.
Before doing this work I supposed one needed a respirator or supplied-air mask to work around the acid fumes. Standing down in the bowl of an empty swimming pool, you would think that the fumes would collect and choke you, and that after you collapse in agony, that no one could reach you for a rescue. In practice, I found that you can just move around and stay away from the fog of the stronger fumes. After diluting the acid to 1/3 strength, the fumes from the bucket are lessened. The fumes arising from the bubbling reaction on the plaster are also milder. The acid is being neutralized by the carbonates in the plaster as the etching progresses, so the spent acid does not fume. Adding a bit of dishwashing detergent to the bucket is said to lessen the fumes, but I didn't feel the need to confirm that.
A more expensive pump is needed to eject wash water out of the pool, not just a cheap sump pump. (You, or a helper, could conceivably bucket out the wash water and scour it out with sponges, but I would not recommend this as effective use of your labor.) Even if you don't plan to be acid-washing, most any pool repair requires that you wash down the empty pool with a garden hose sprayer, and this means you collect a pond of spent wash water in the deep end that must be removed. You want a small submersible dewatering type of pump that can scour down to the height of the bottom drain box and can fit into that box. The type of pump with an impeller on the bottom covered by a grid are appropriate, or you could use a pump with a suction inlet hose that you fix down in the bottom drain box. It should be able to run dry and run continuously. It should handle at least a few gallons a minute, or roughly what your hose sprayer(s) can deliver.
The wash pump must either be able to handle small bits of plaster and debris in the wash, or else you must attach a screen to the inlet to keep this material out of the pump. You don't want to be interrupting your acid-washing or plastering work to disassemble your pump to clear a jam from a bit of plaster.
Spent acid wash is not very acidic at the end of the process, having spent time in intimate contact with alkaline pool plaster, so you don't have to be too concerned about it being a hazard if ejected onto your lawn or down a storm drain. It would be prudent to minimize the area of contact with the lawn so as to avoid killing the grass. If there are any environmental issues with discharging to the yard surface or a storm drain, you may need to improvise a collection system (Rubbermaid Brute drums are my item of choice) which you can use to pH-neutralize and decant the wash water in batches.
Have a comment or question on my pool plastering project or techniques?
Did my mad scribblings incite you to try and fail? Or perchance, succeed!?
Have I made an error or omission in my essay?
Email me at:
kinch@truetex.com
Richard J. Kinch
Back to Home page
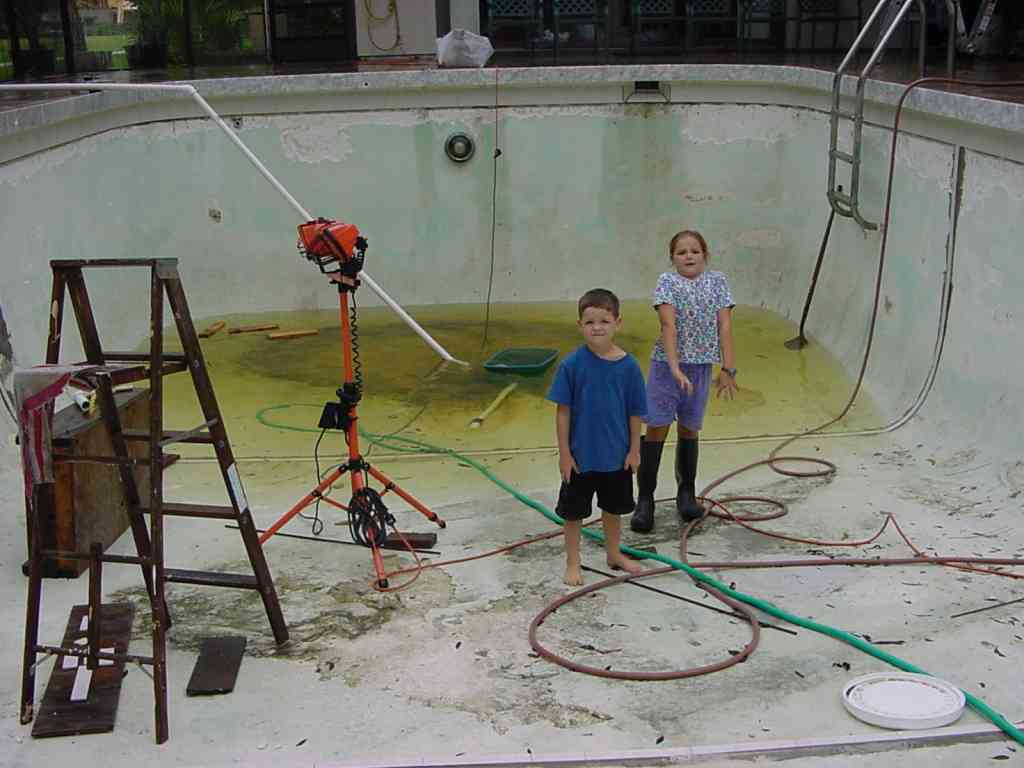
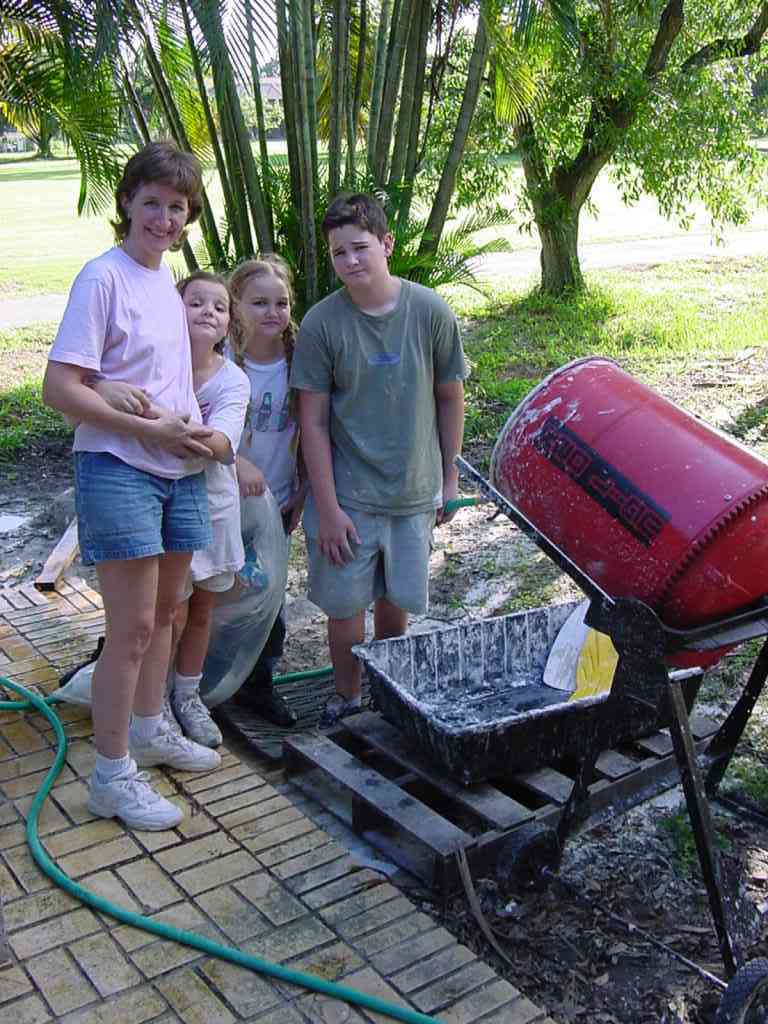
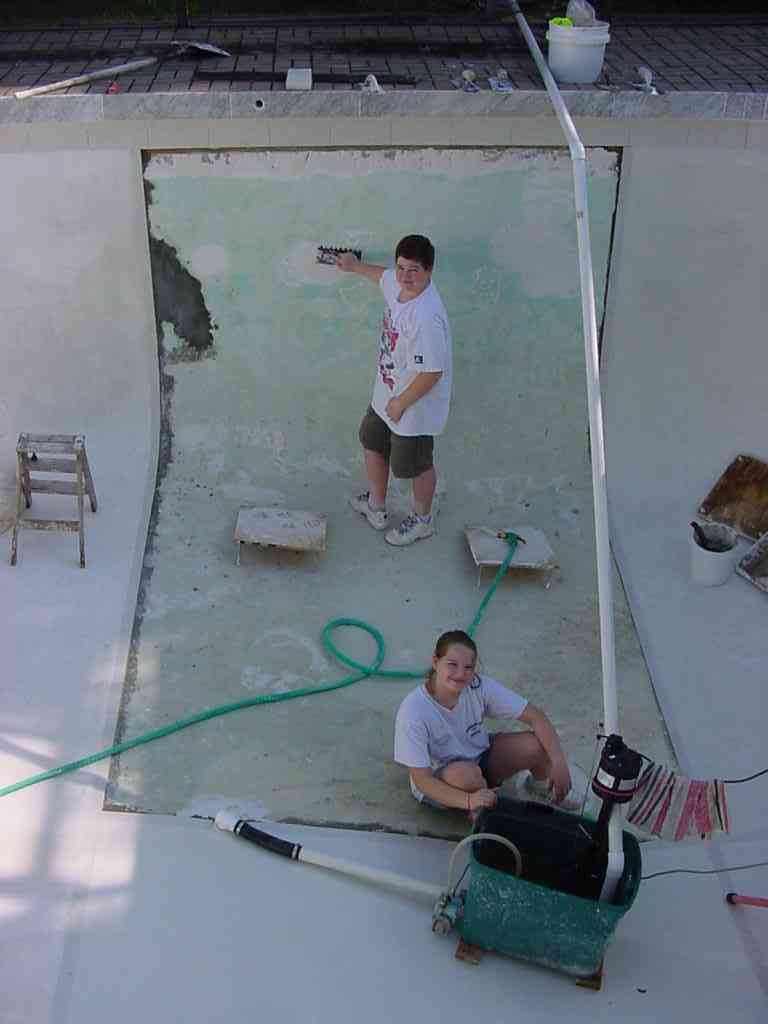
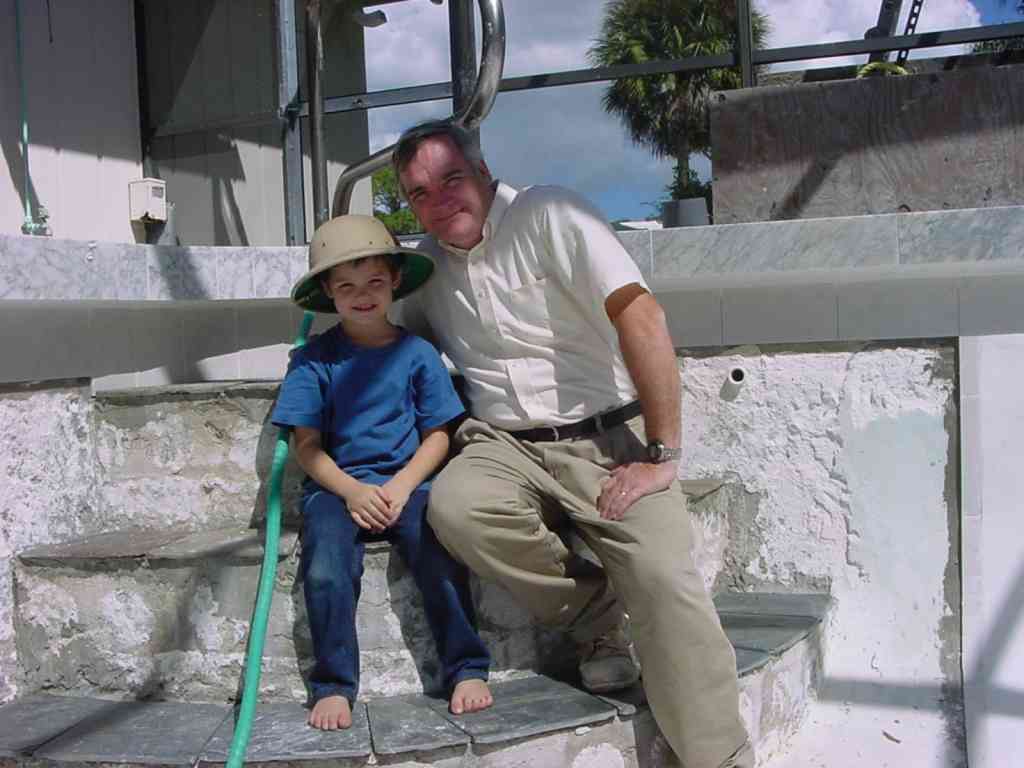
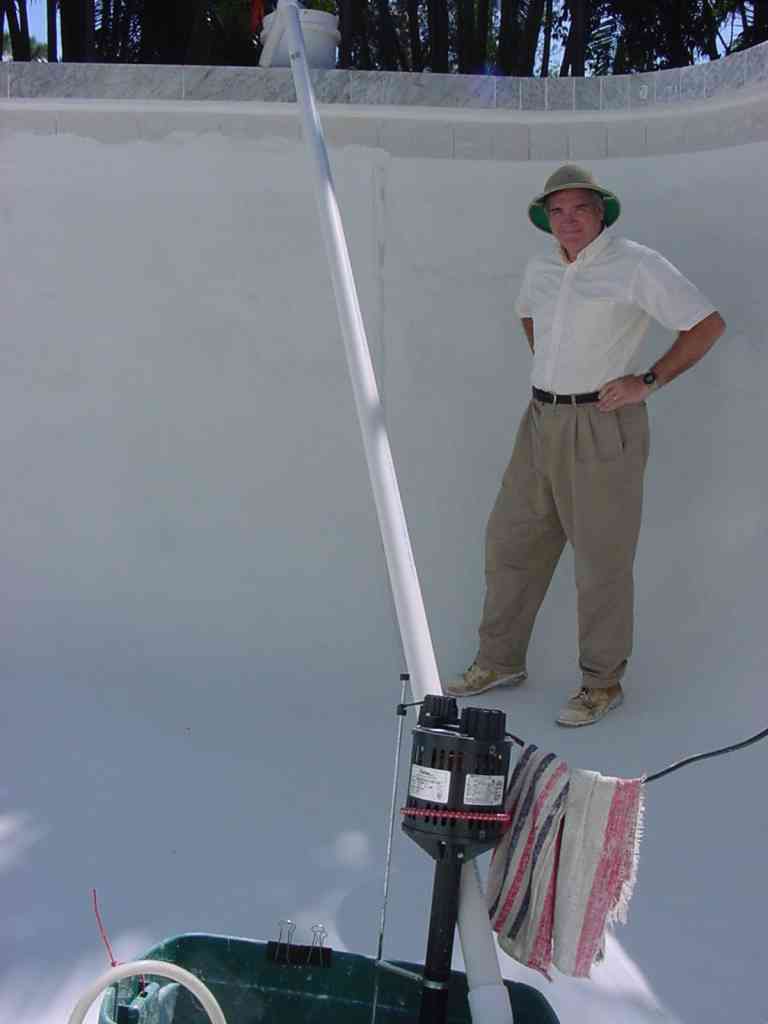
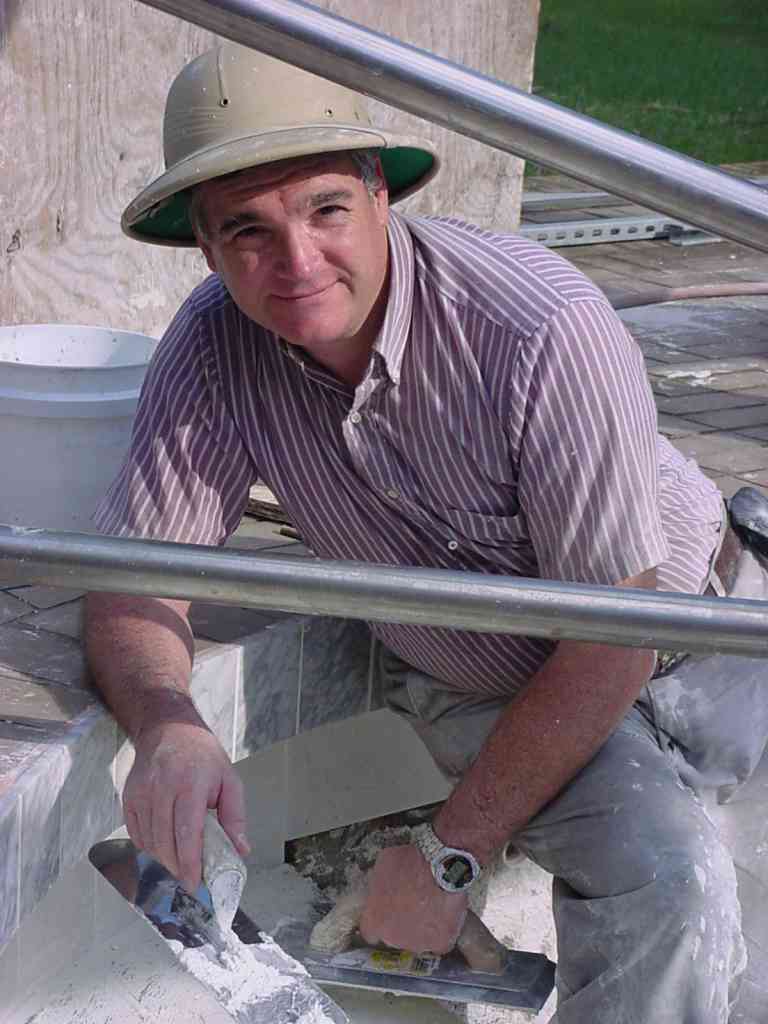
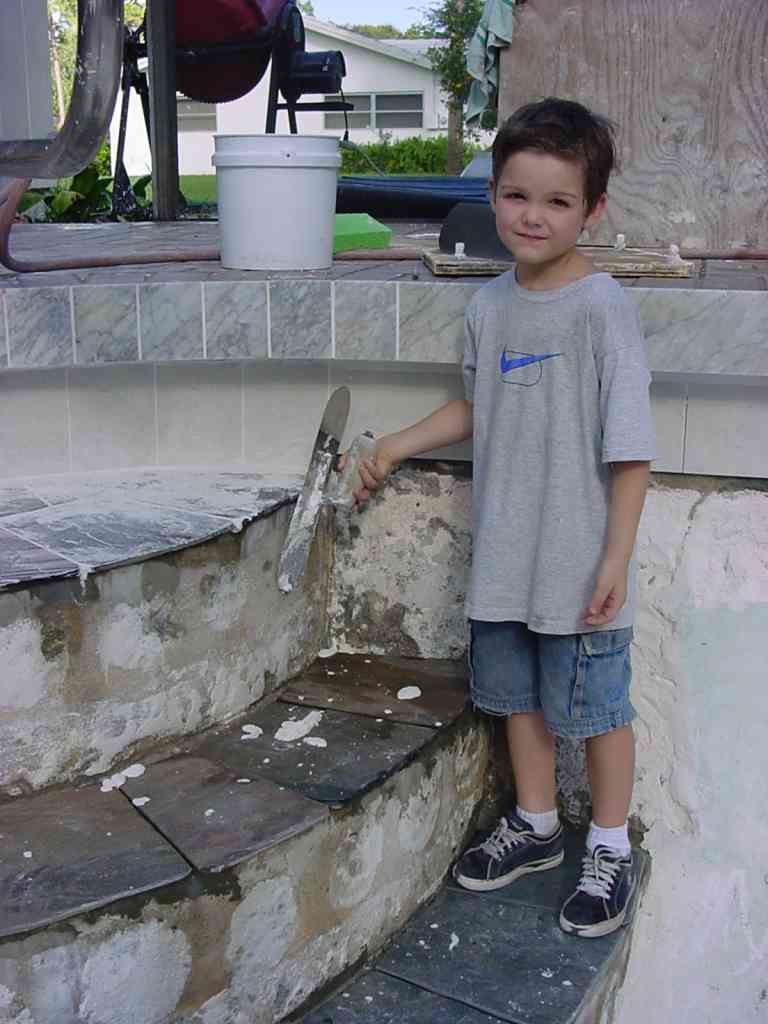
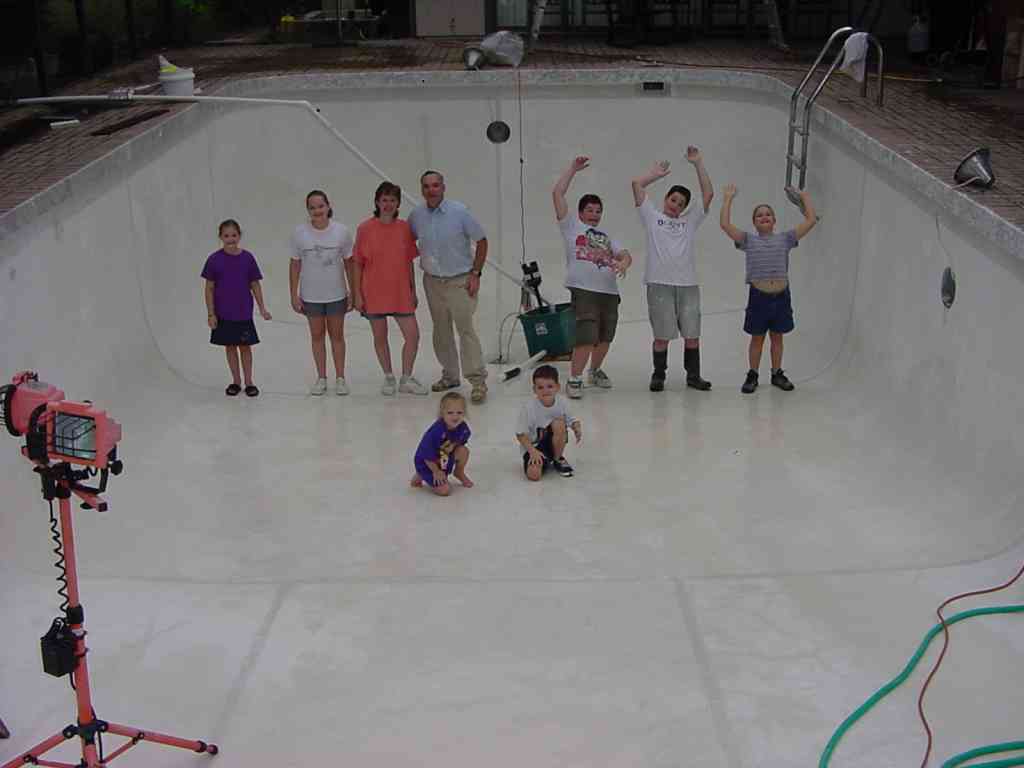
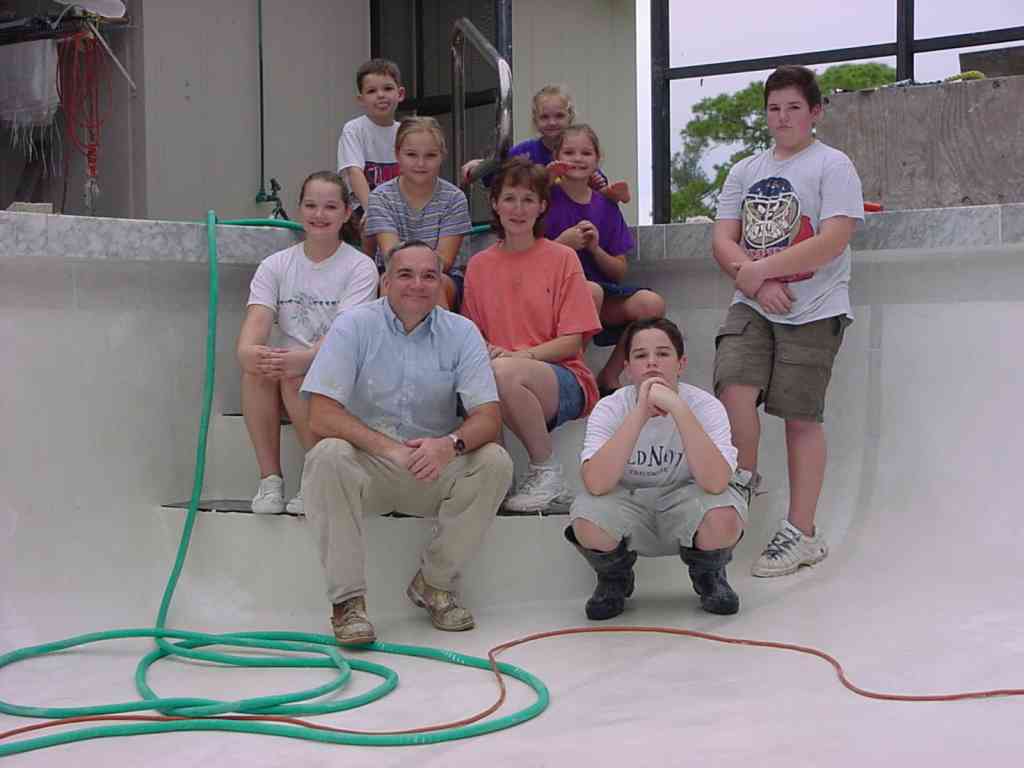
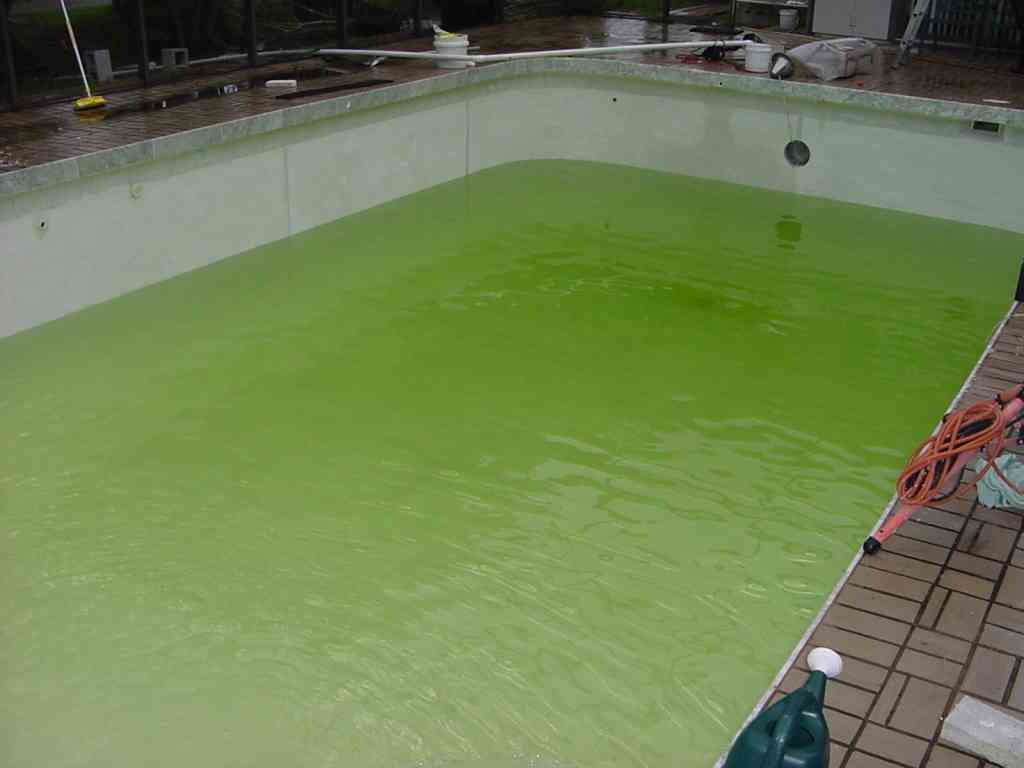
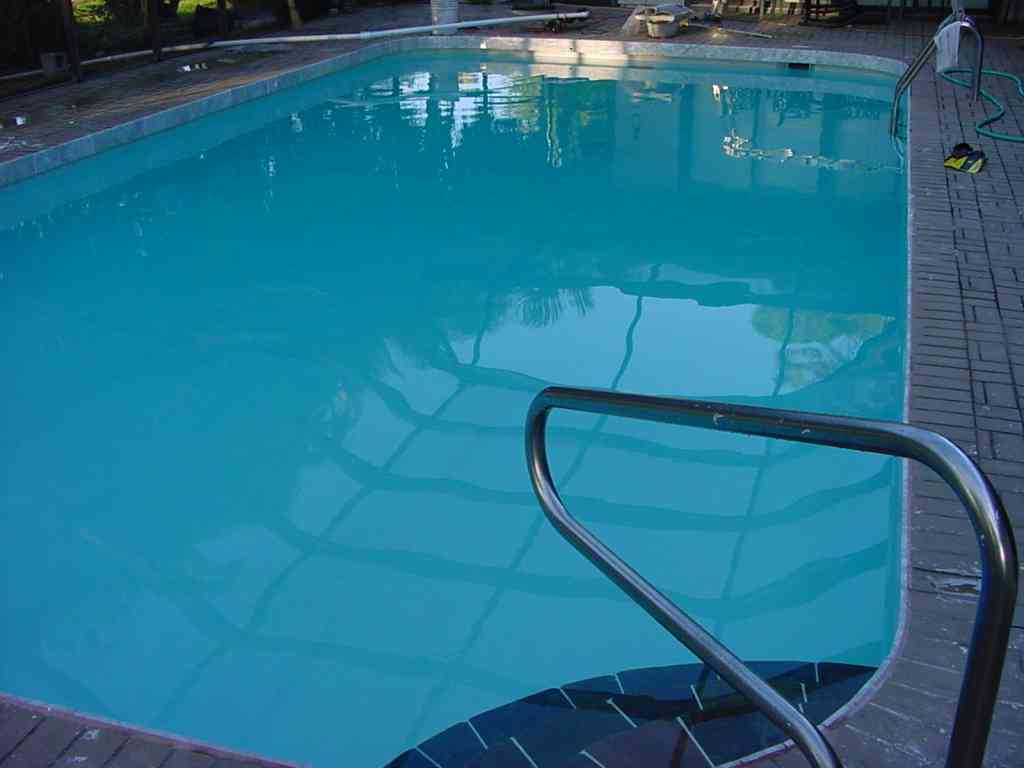
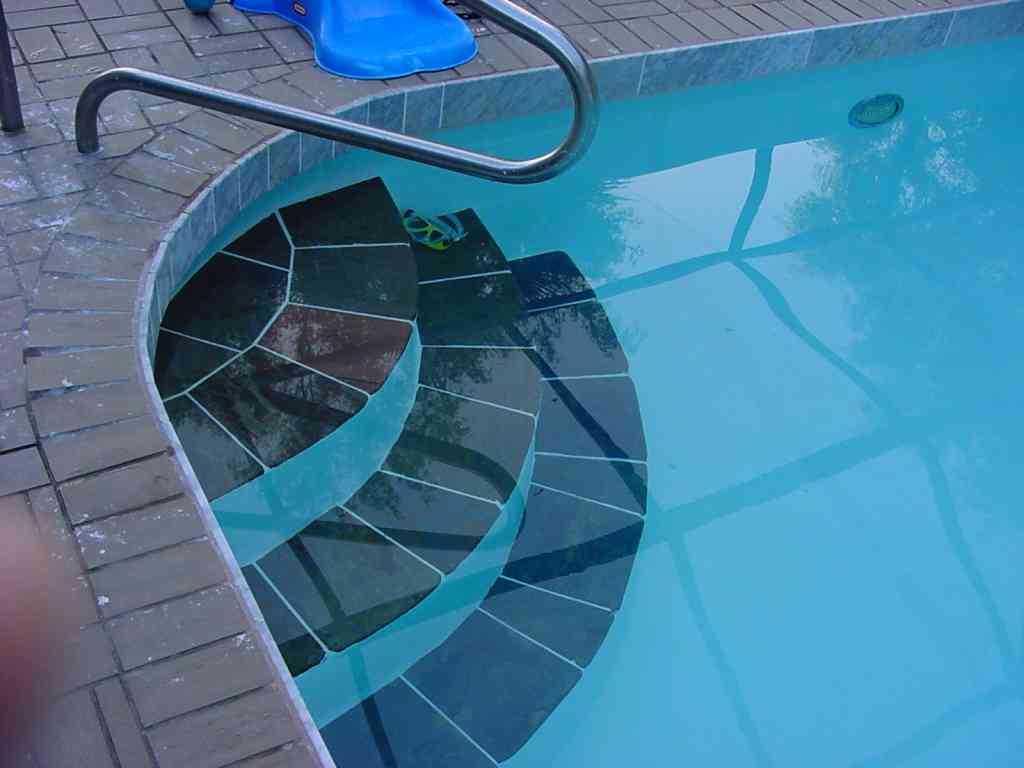
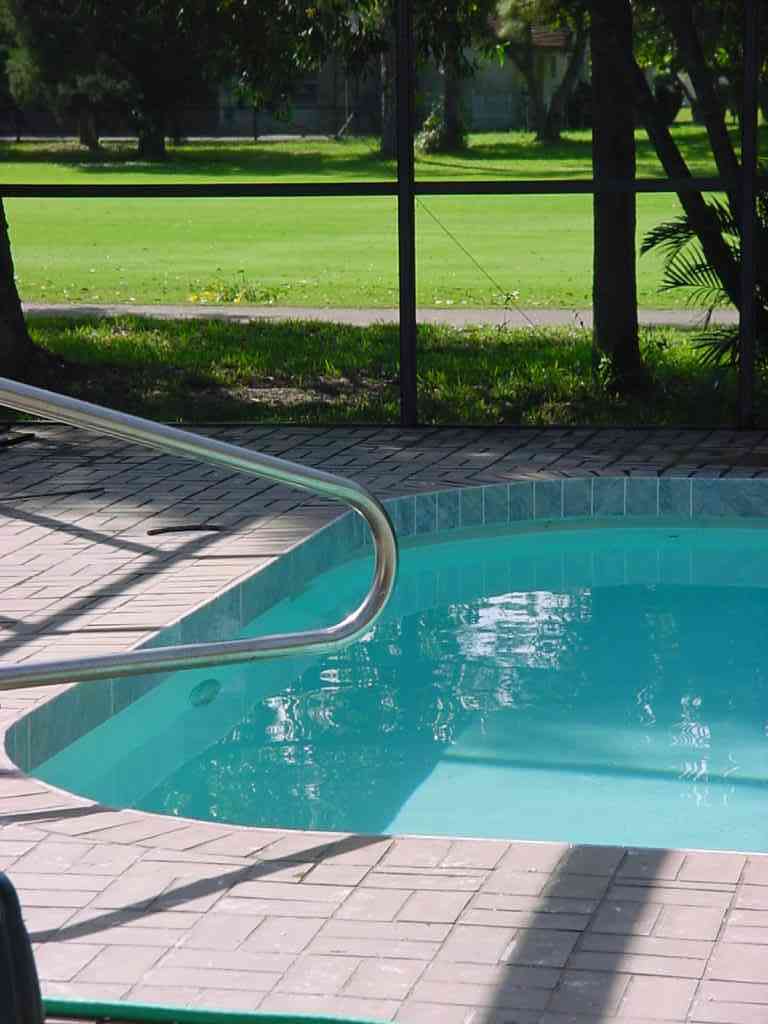